Parametric design flow
Product templates and design flows
TwikFit is cloud-based software built to design custom-fit products. Since the design process depends on the type of product you want to fit and the features available, we introduced the concept of product templates.
A product template is a 3D product design that can be used in TwikFit as a starting point to create a custom-fit design. A product template is linked to a design flow, a number of predefined design steps that guide you through the process of designing a custom-fit product.
The ownership of a product templates is either private or public. Private templates are only available to use within your company space. This is the best option for branded products or products where intellectual property needs to be protected. Public templates are open and usable by every user of TwikFit.
Parametric design flow
The parametric design flow consists of three predefined design steps:
Functional personalization
Aesthetic personalization
Check result and order.
An example product template to illustrate this design flow is the thumb brace product.
Functional personalization
Specify the requested body measurements to adjust the product’s dimensions.
When changing a measurement, the thumb brace shape will be adjusted in real-time in the 3D view. Note that all body measurements should be specified in millimeters.
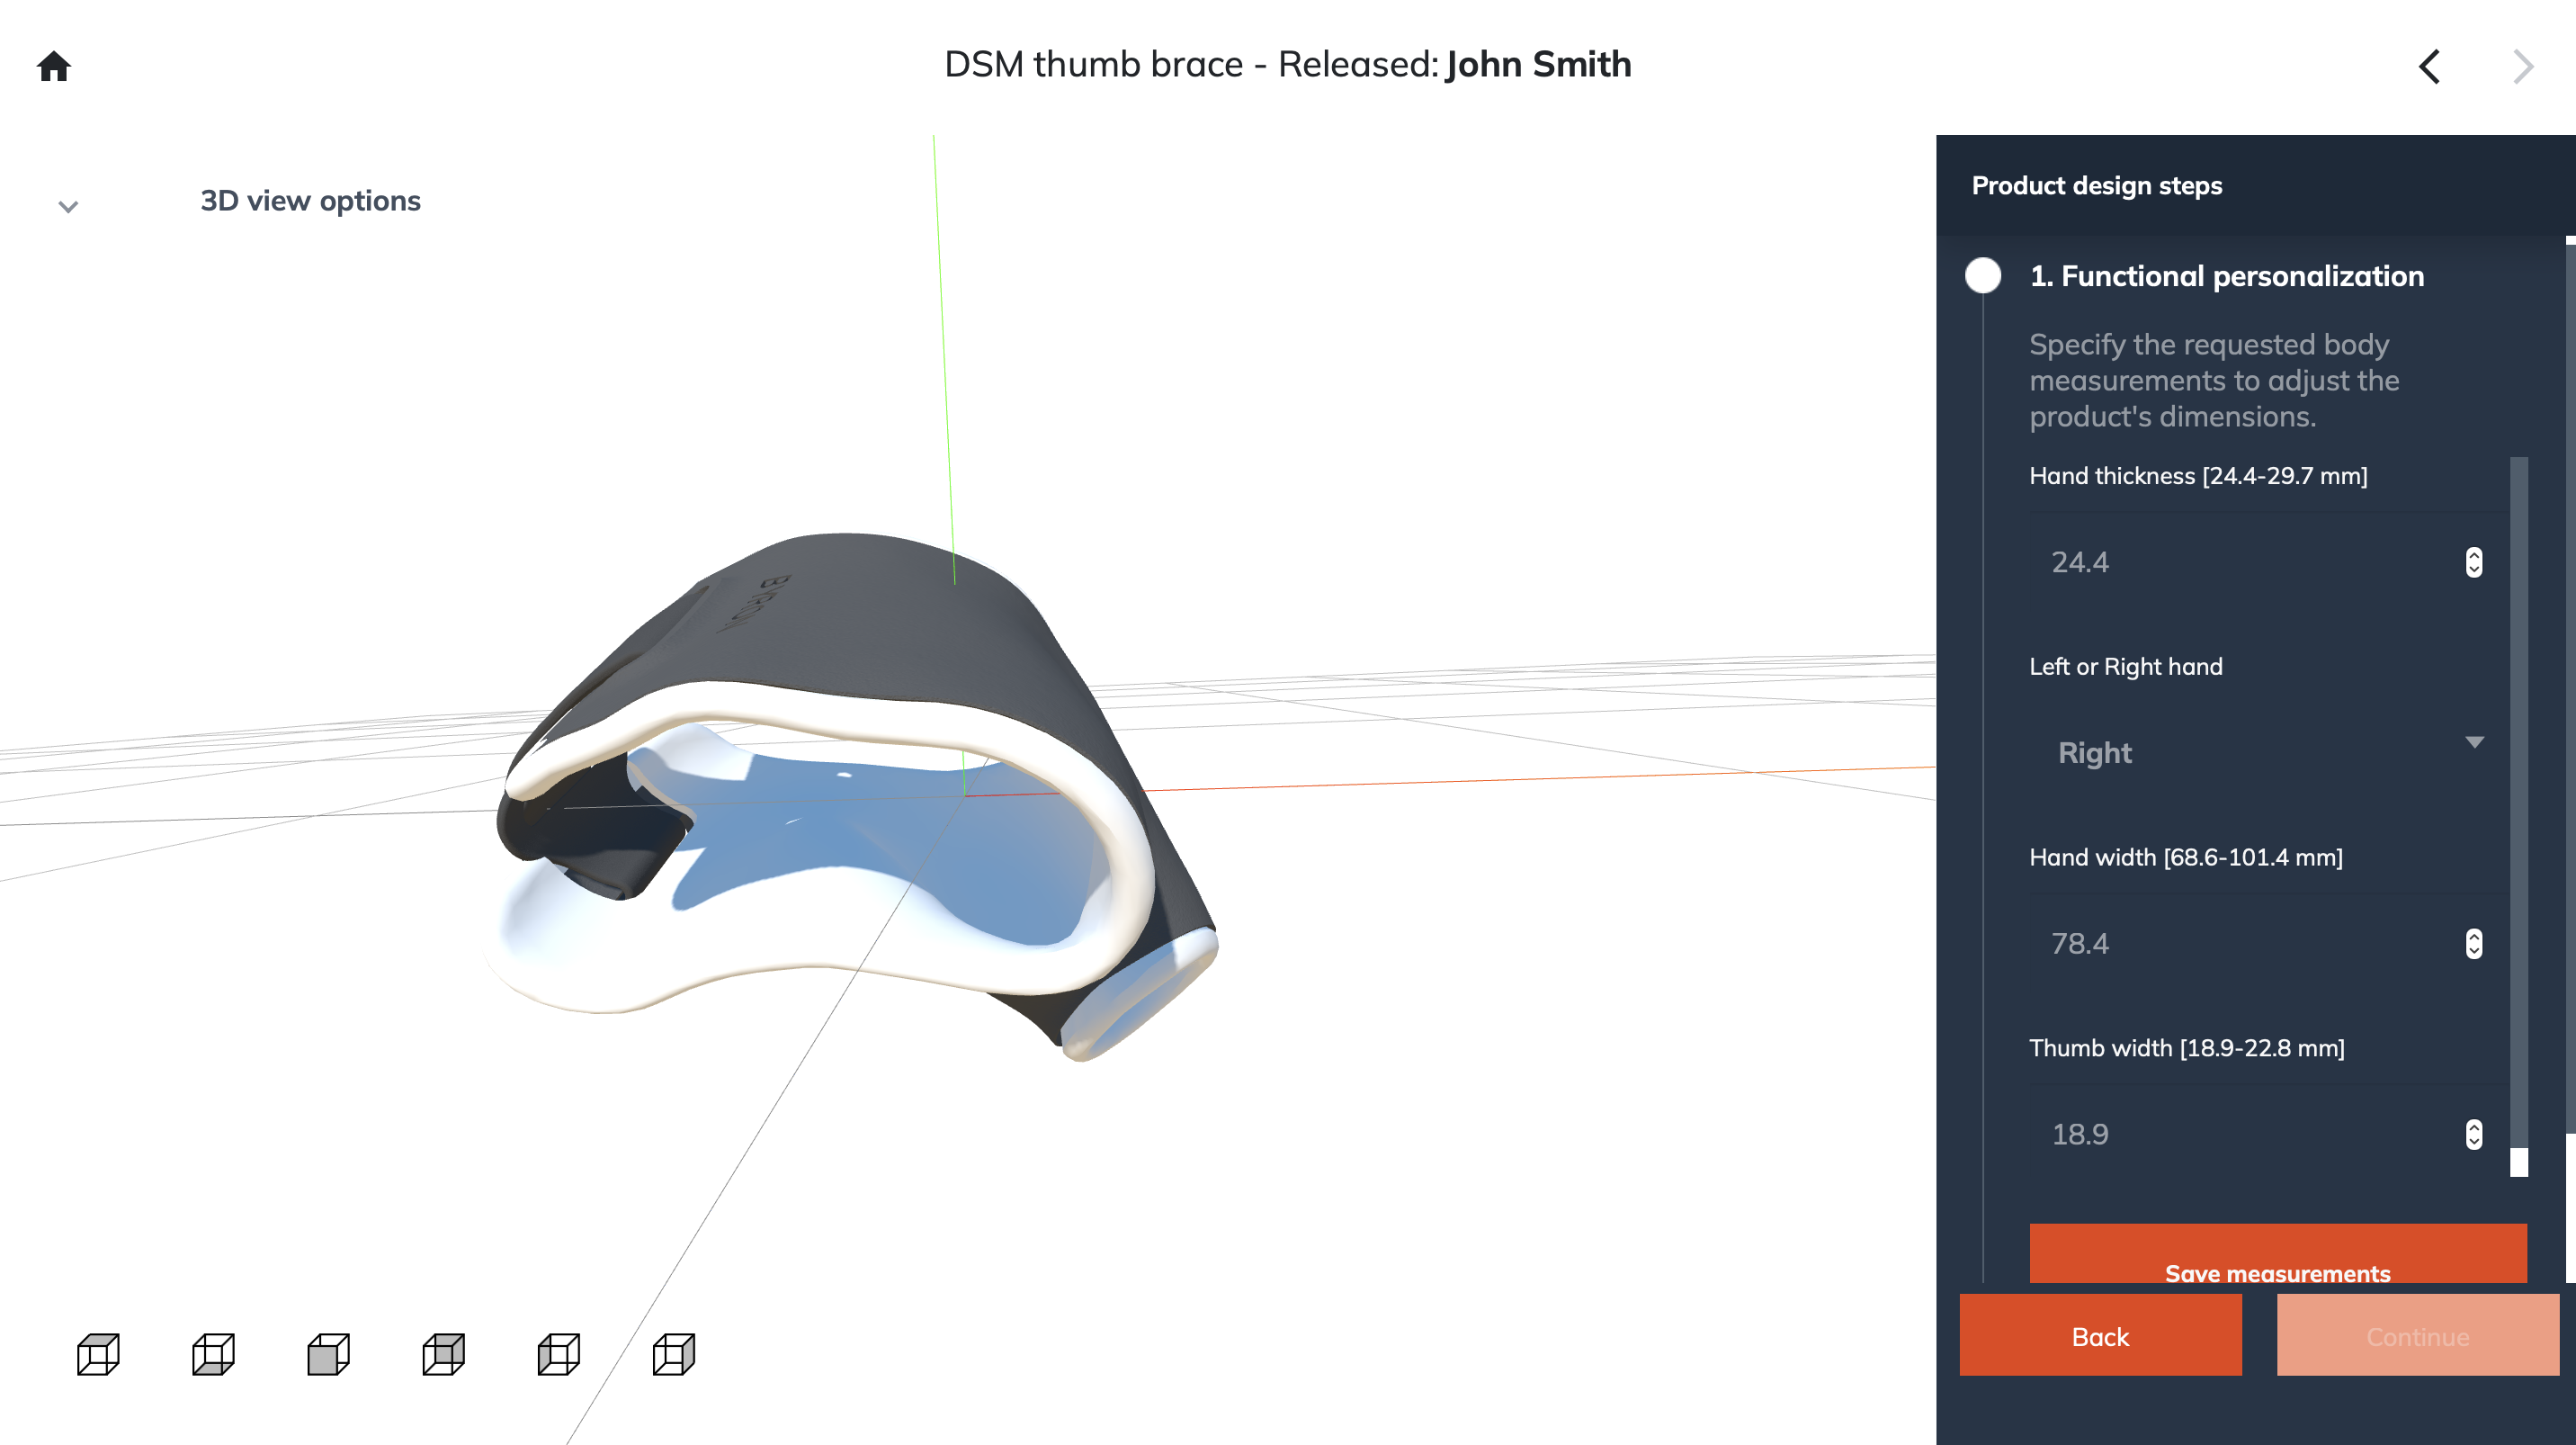
After finishing all measurements in the list (note that the list is scrollable), click the ‘Save measurements’ button to apply the measurements and save them to the database.
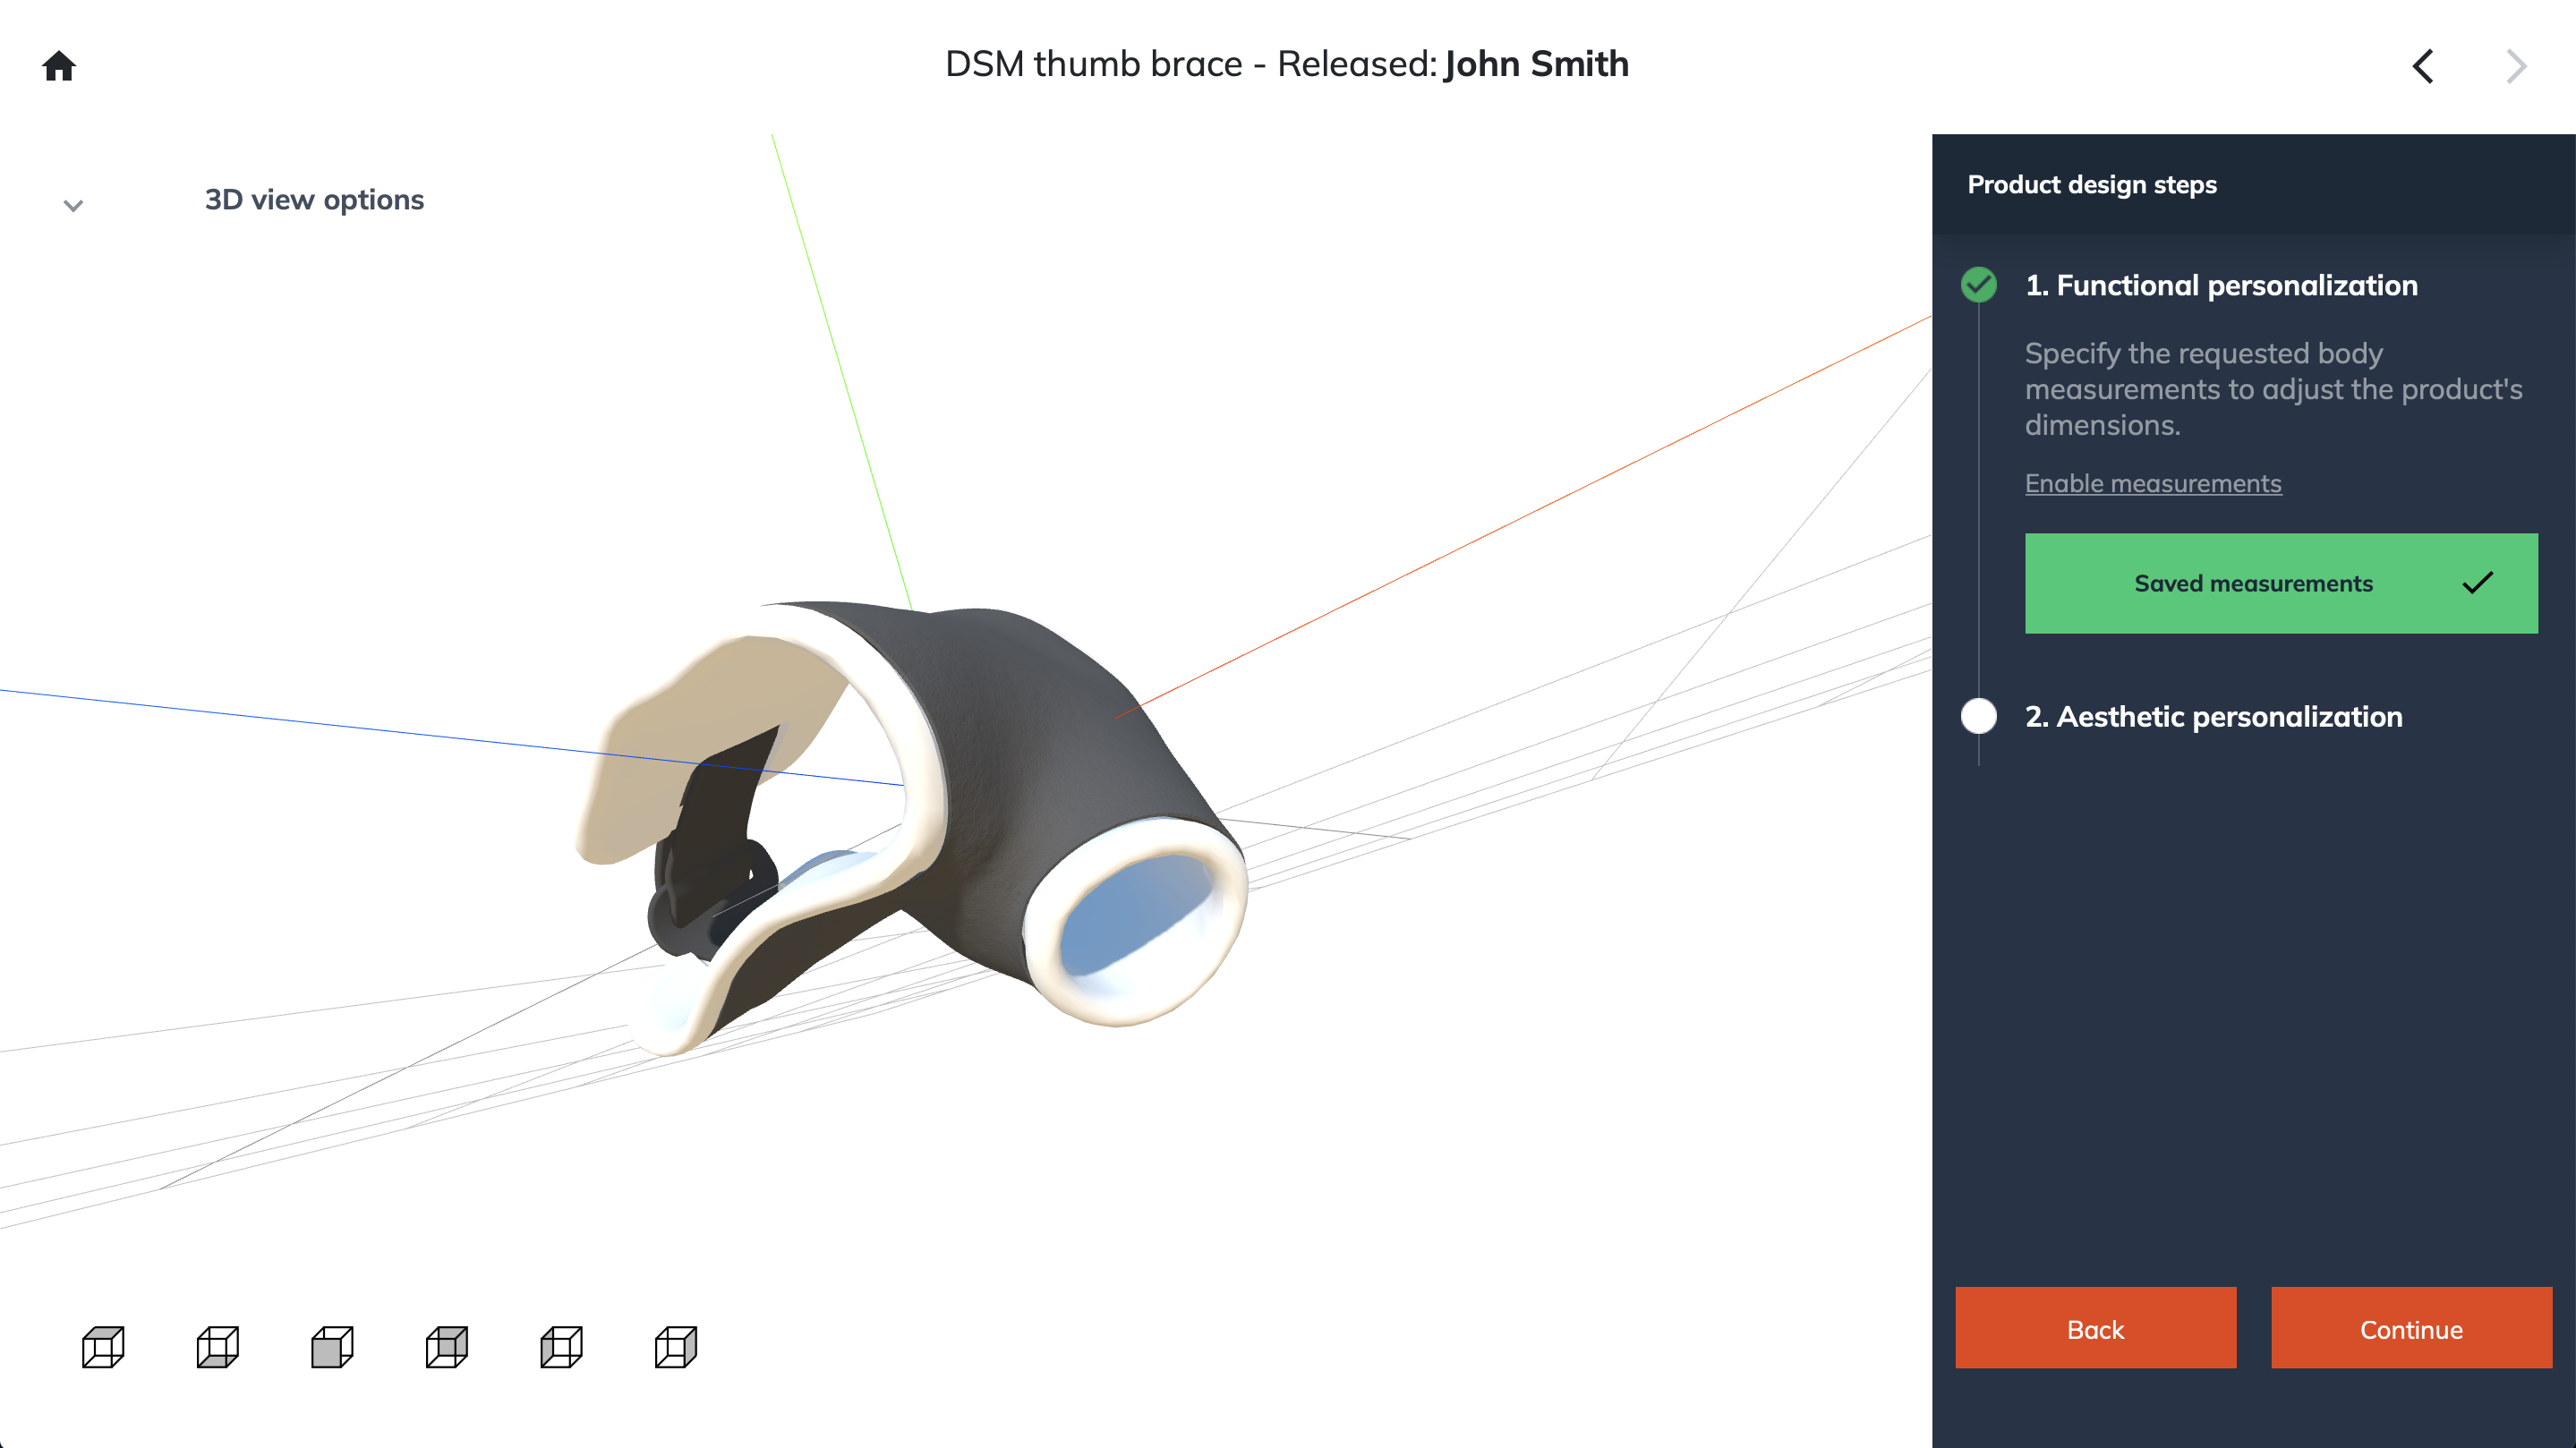
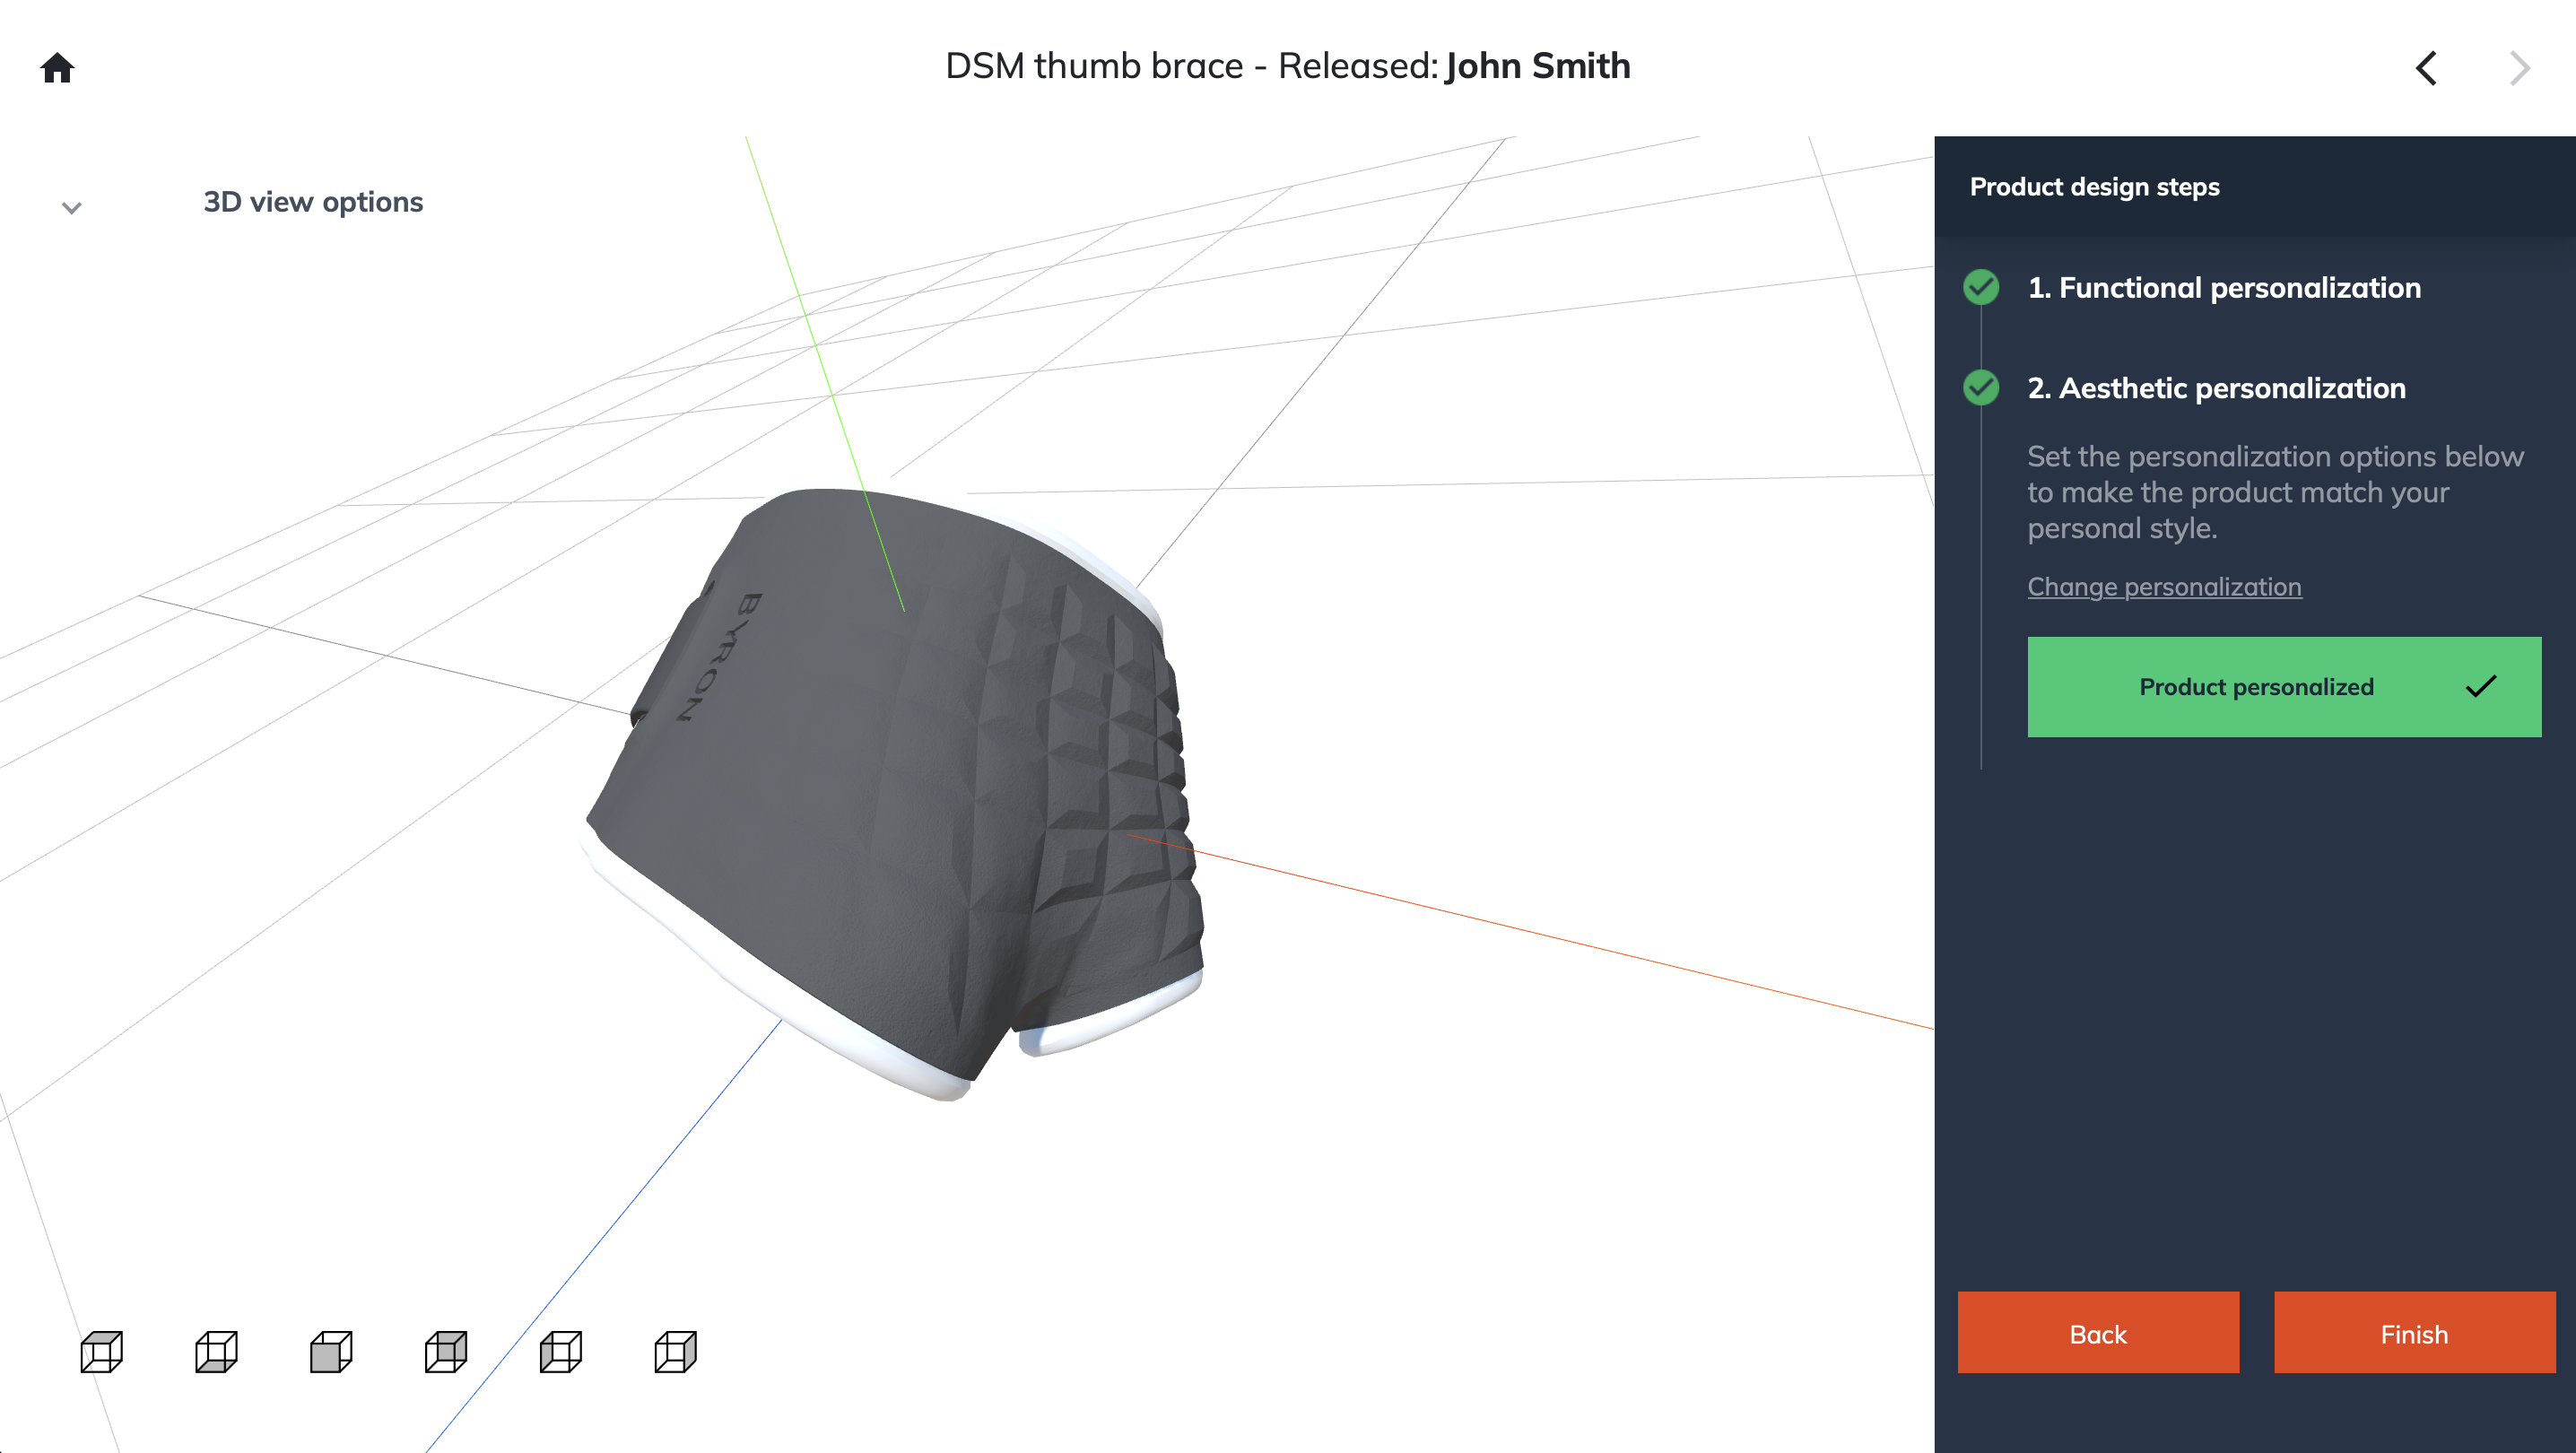
When the state turned green, i.e., successfully saved all measurements, you can continue to the next state by pressing the continue button on the bottom right.
Note that when a state turned green, your design progress is stored persistently in the database. On reopening the design, you will see that the measurements are restored, and you can continue designing from the last saved state.
Aesthetic personalization
In the aesthetic personalization state, a number of personalization options available on your product can be set. In the example below, a personalization option called ‘Texture’ is changed to ‘Squares.’
The option ‘Hand’ is also turned on. A hand will appear on the screen wearing the brace, which makes it easier to visualize the final product.
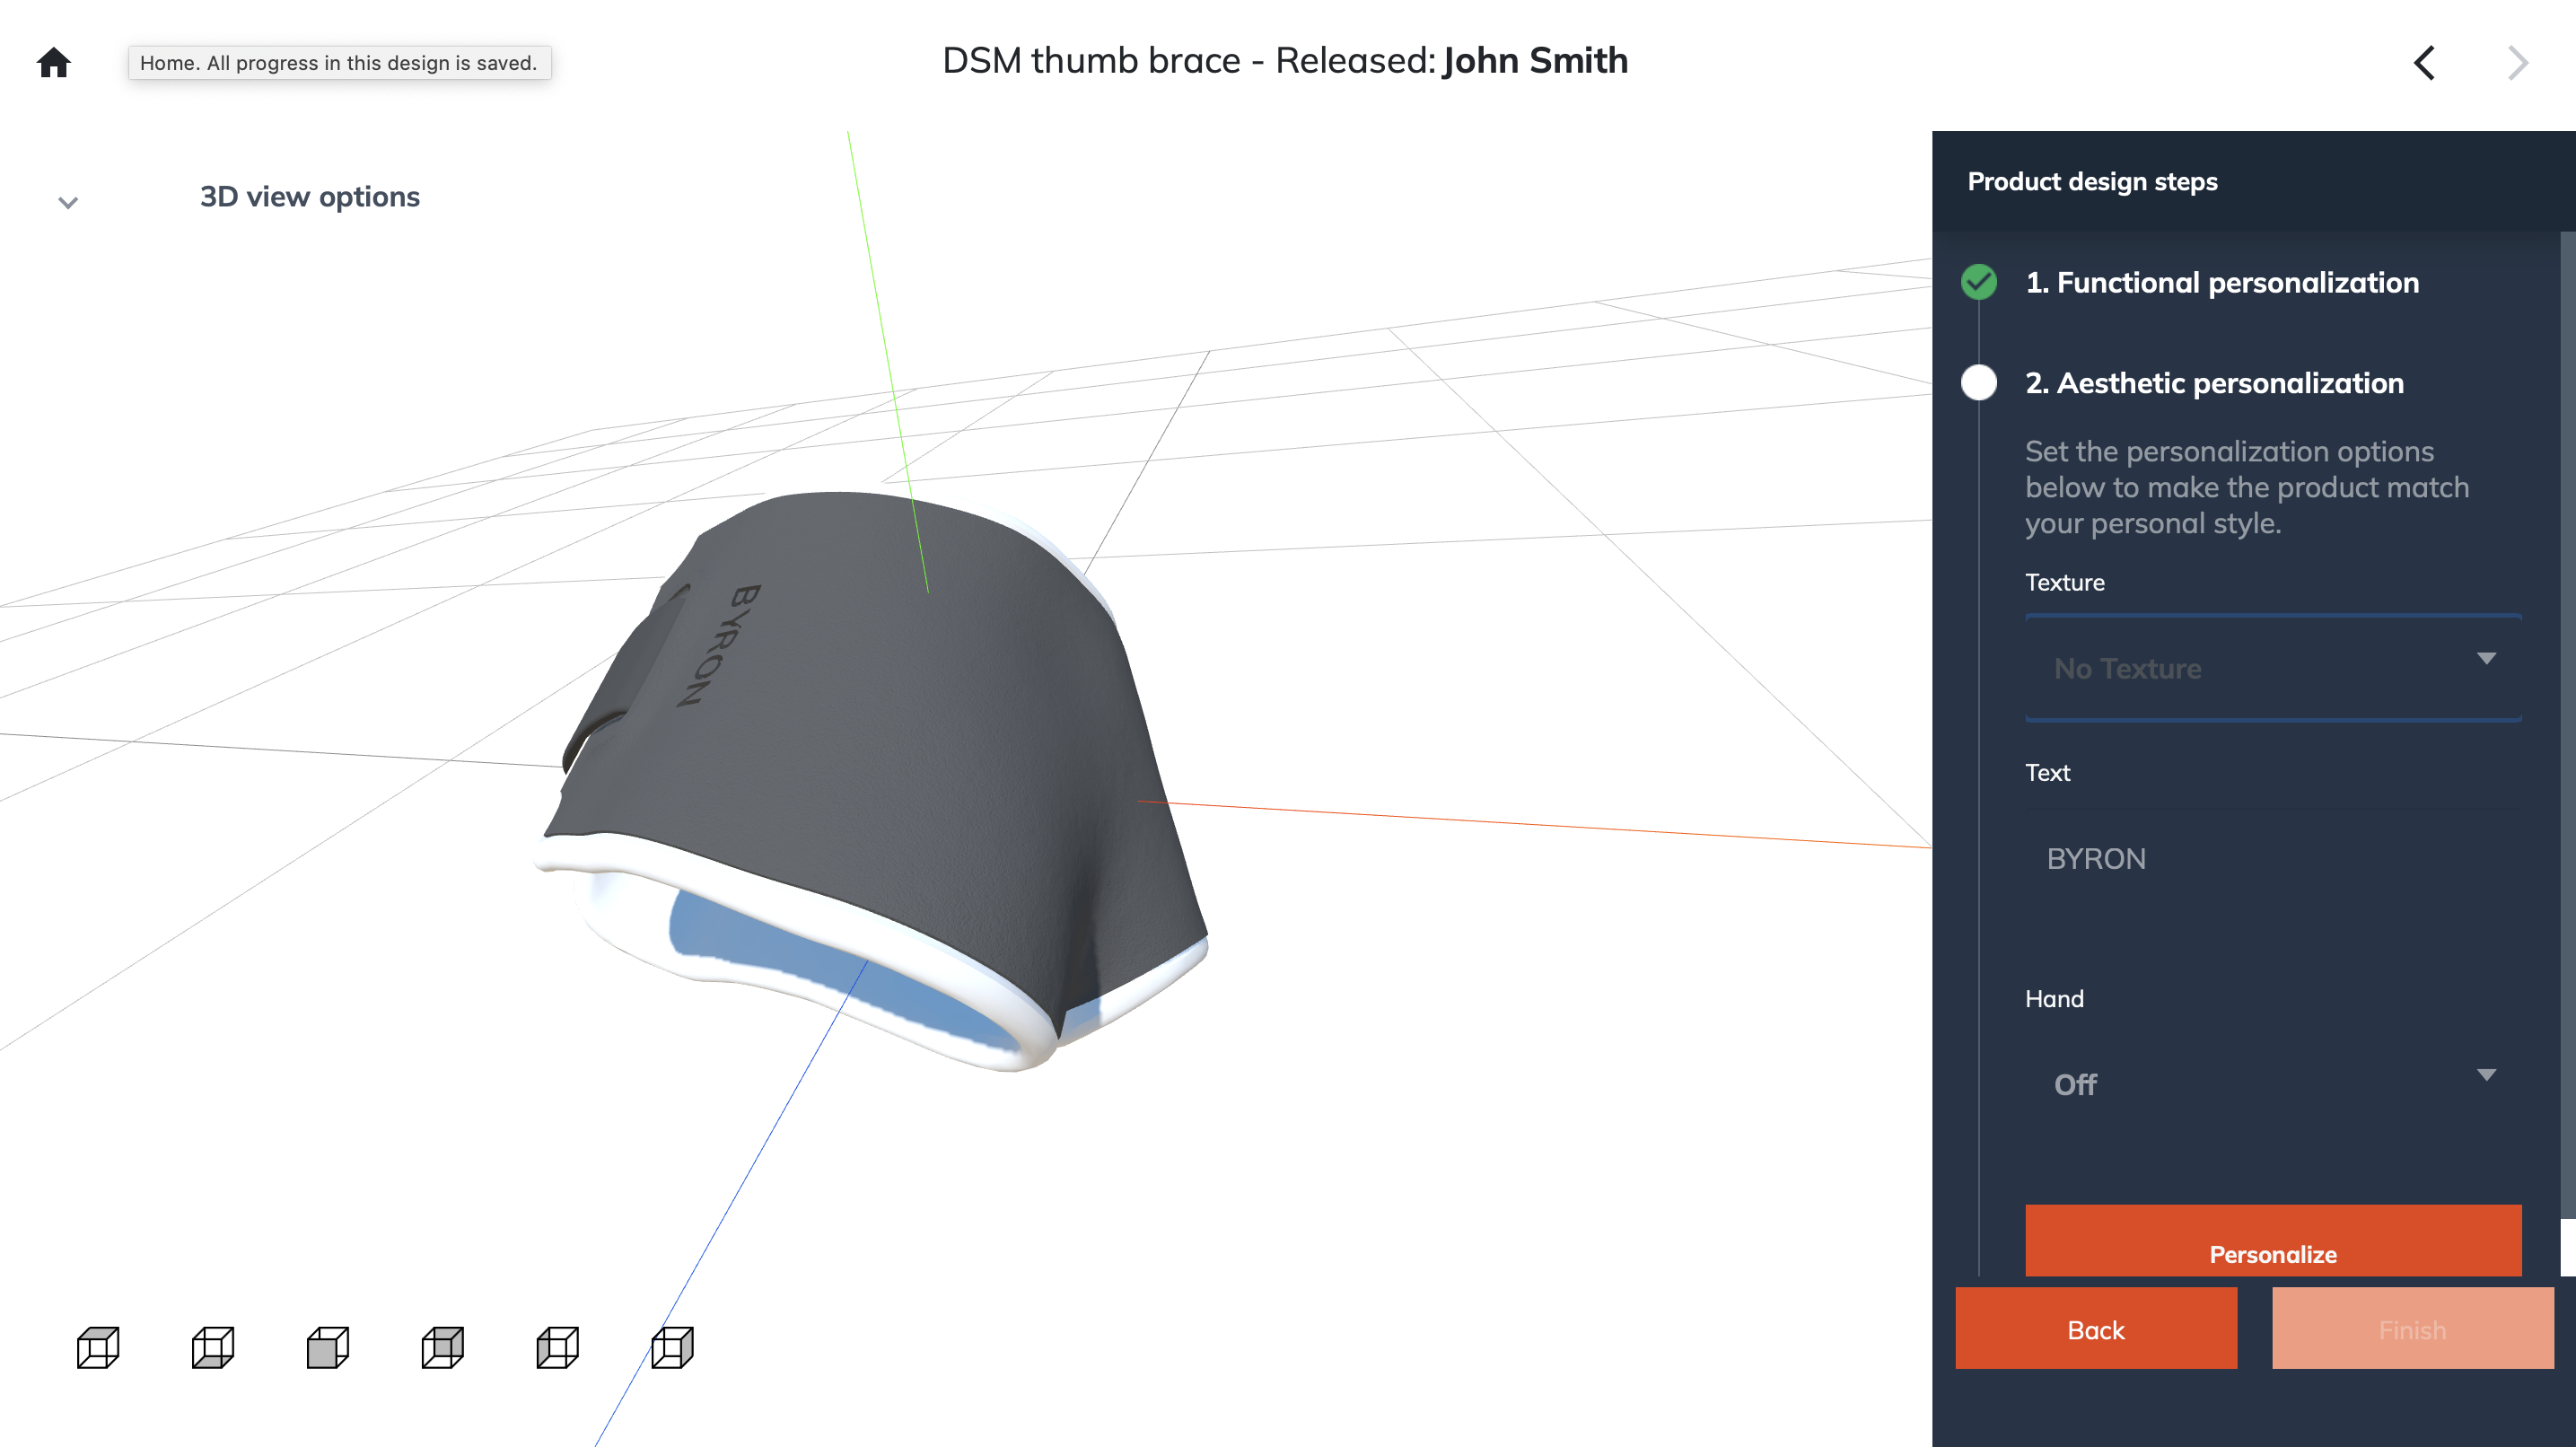
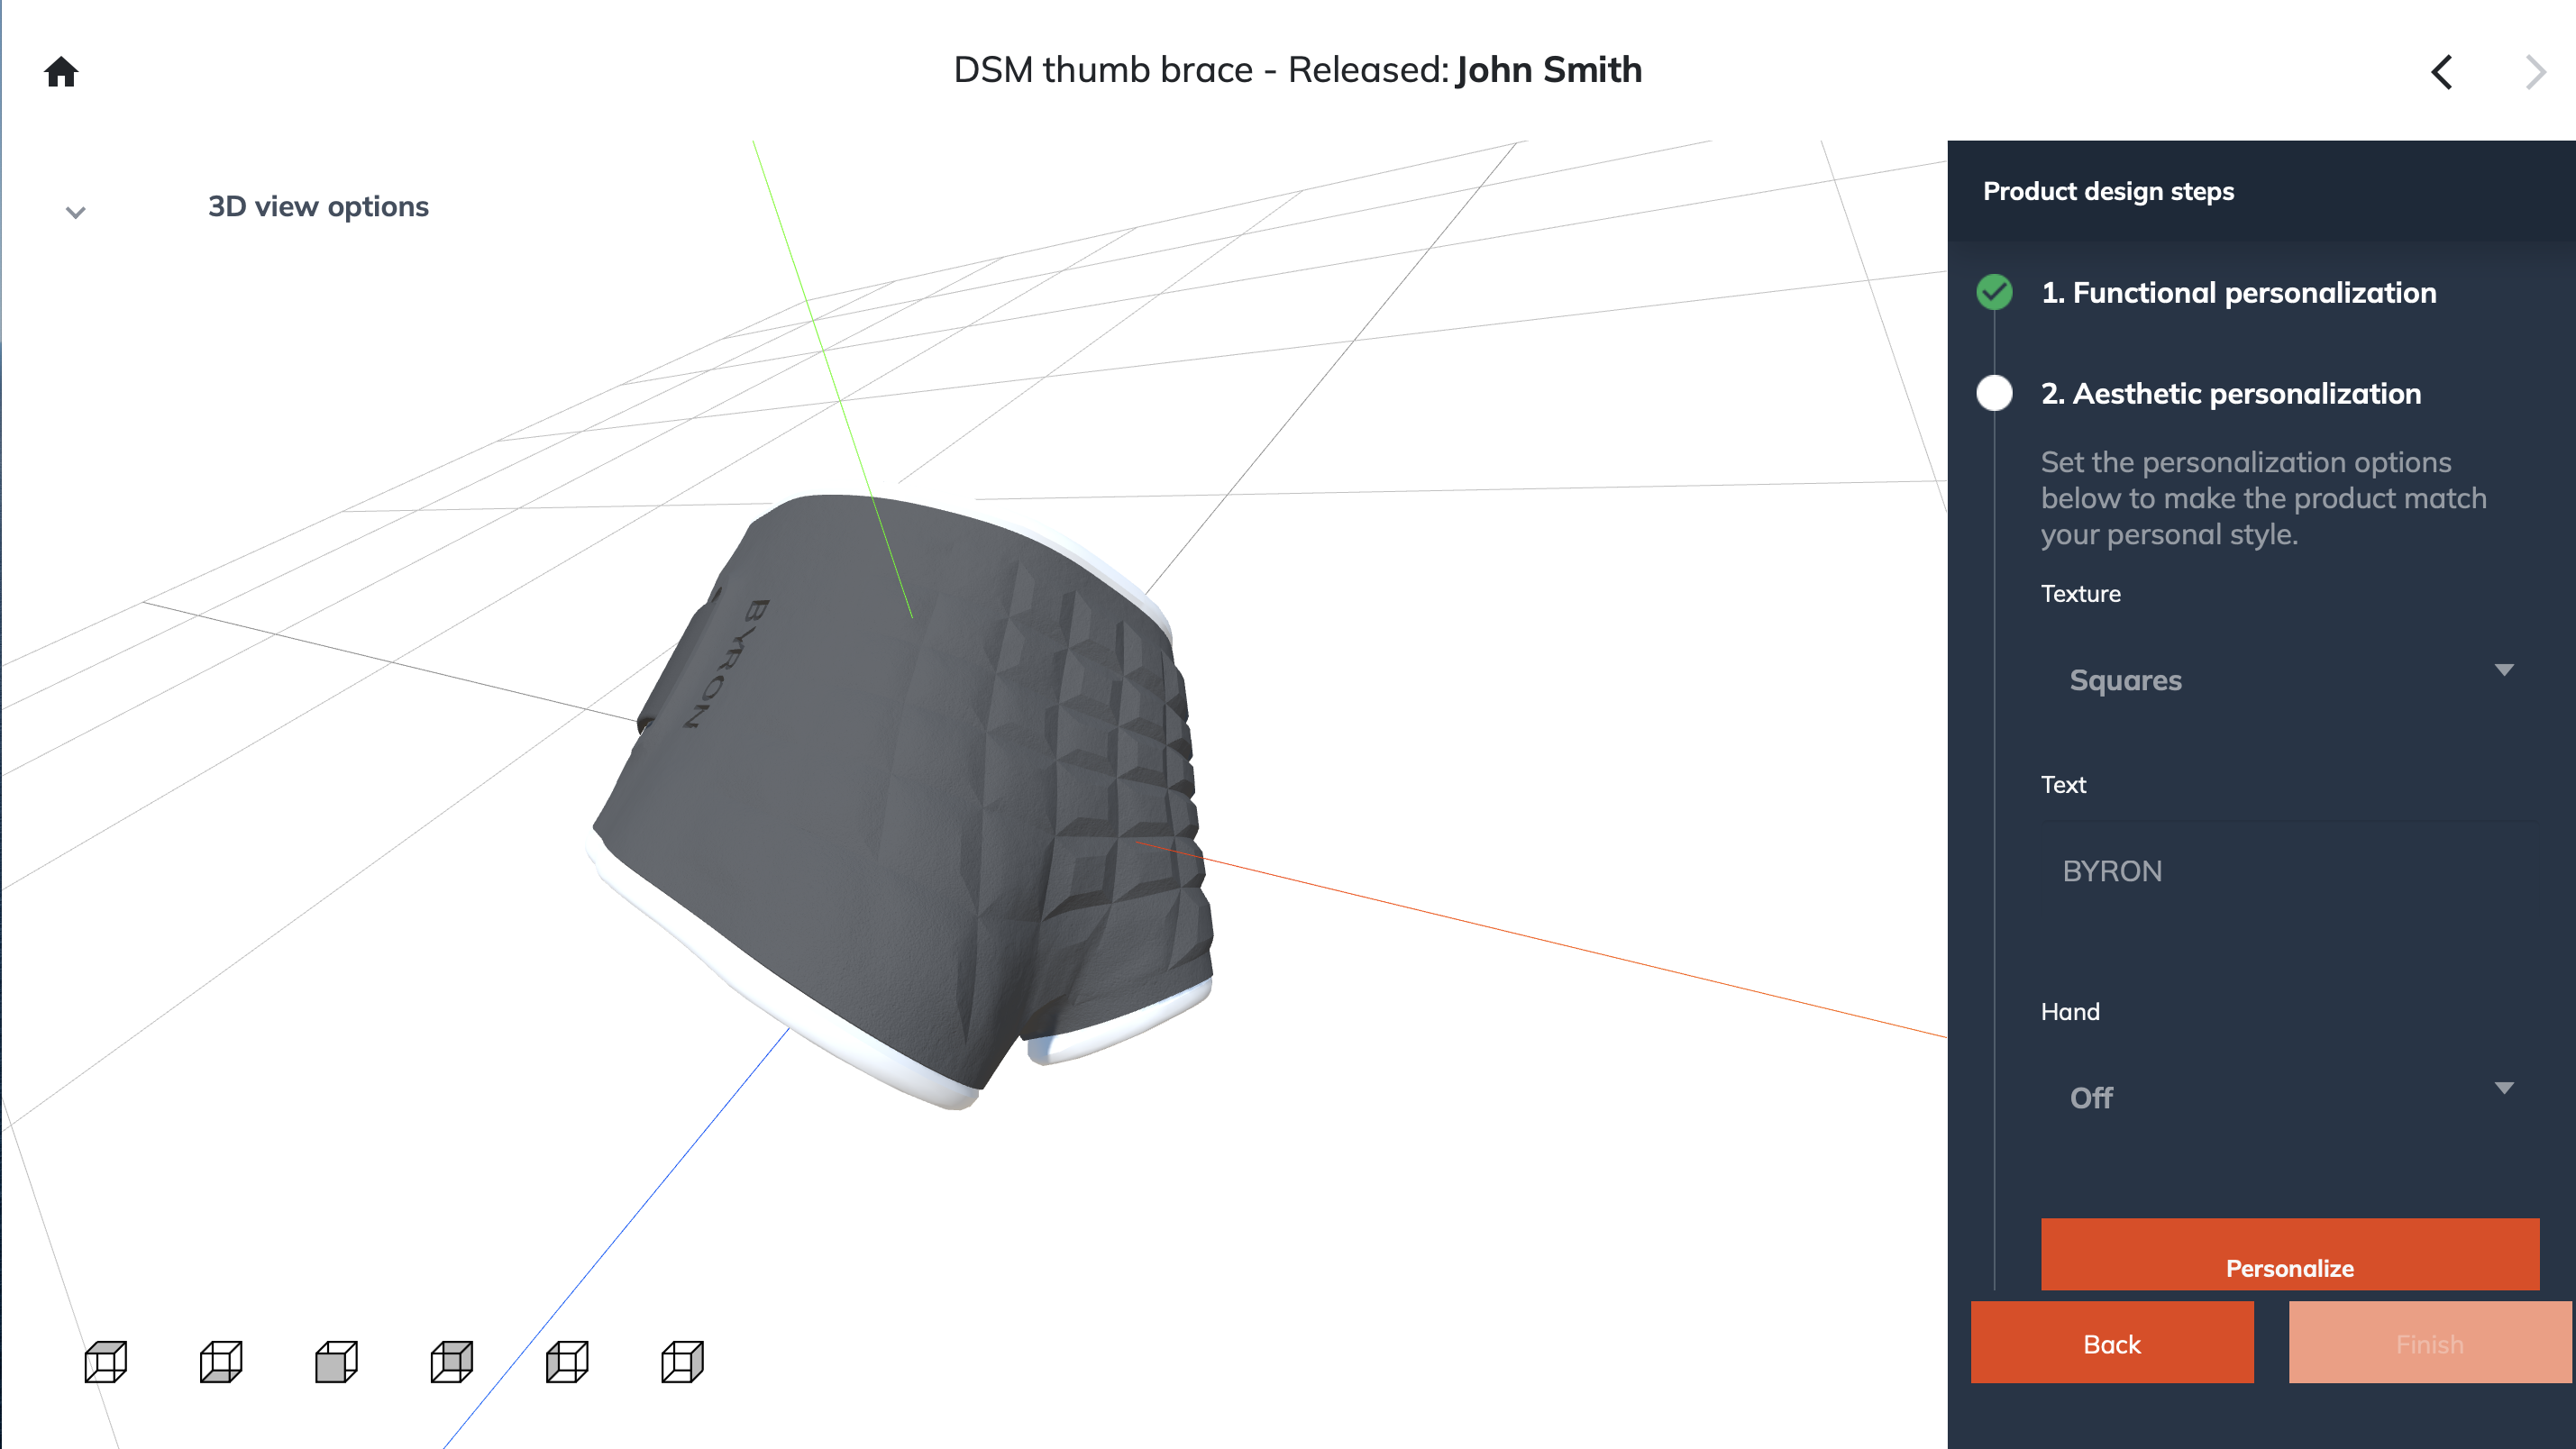
To finalize the aesthetic personalization, click ‘Personalize'. This will apply the selected styling options and allow you to continue to the next state.
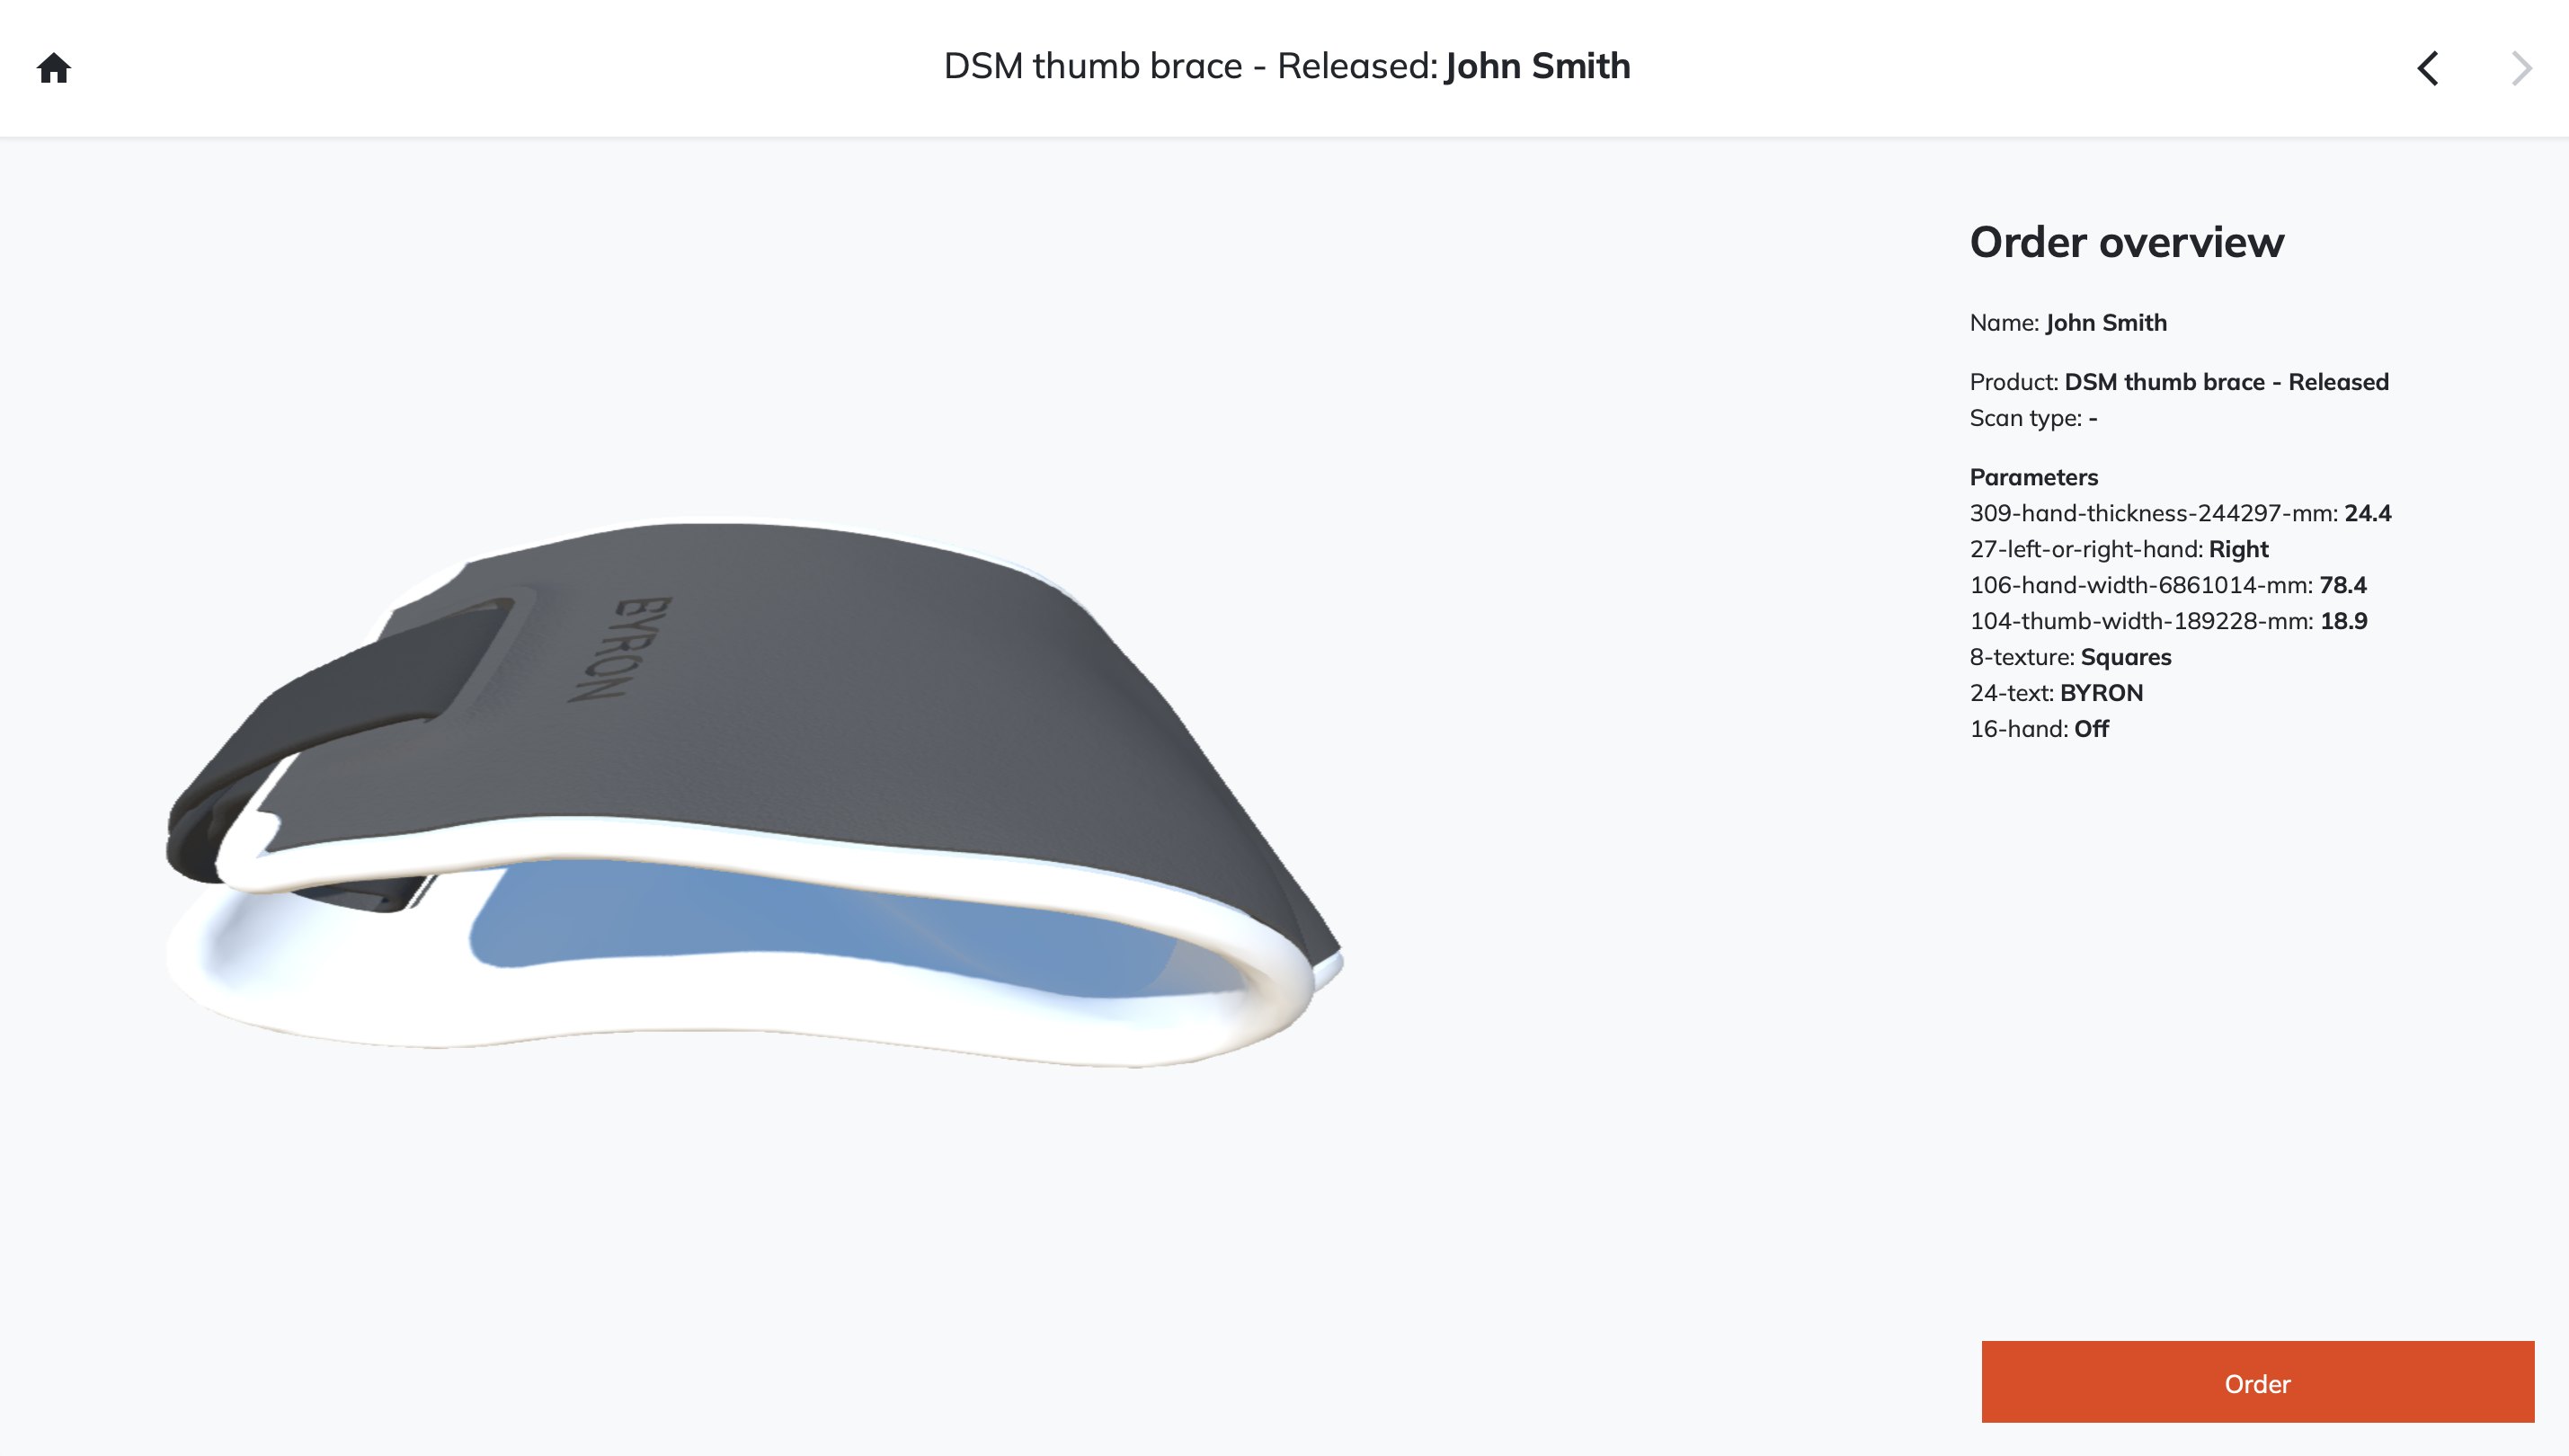
Check result and order
In this final state, carefully check your design in the 3D view before clicking the ‘Order’ button. The order button will trigger an order flow and prepare your design for manufacturing.