Wrist and thumb brace
Features specific to the product:
After the anatomical points are set, the TwikFit platform optimizes the brace to the 3D scan and makes it fit meticulously around the hand.
The wrist or thumb brace thickness can be adjusted to create a cast that fully immobilizes the hand or wrist to create a splint that supports it.
The location of locking mechanisms can be changed depending on the patient’s needs.
The length of the brace can be extended along the arm.
A cut-out area can be left at fixed bony prominences for improved patient comfort.
Feature soon to be released: the size and location of cut-out areas can be freely defined. For example, to leave holes where a patient has a wound.
Step by step configuration:
Step | Screenshot |
|---|---|
Select product template & click “Start design flow” | 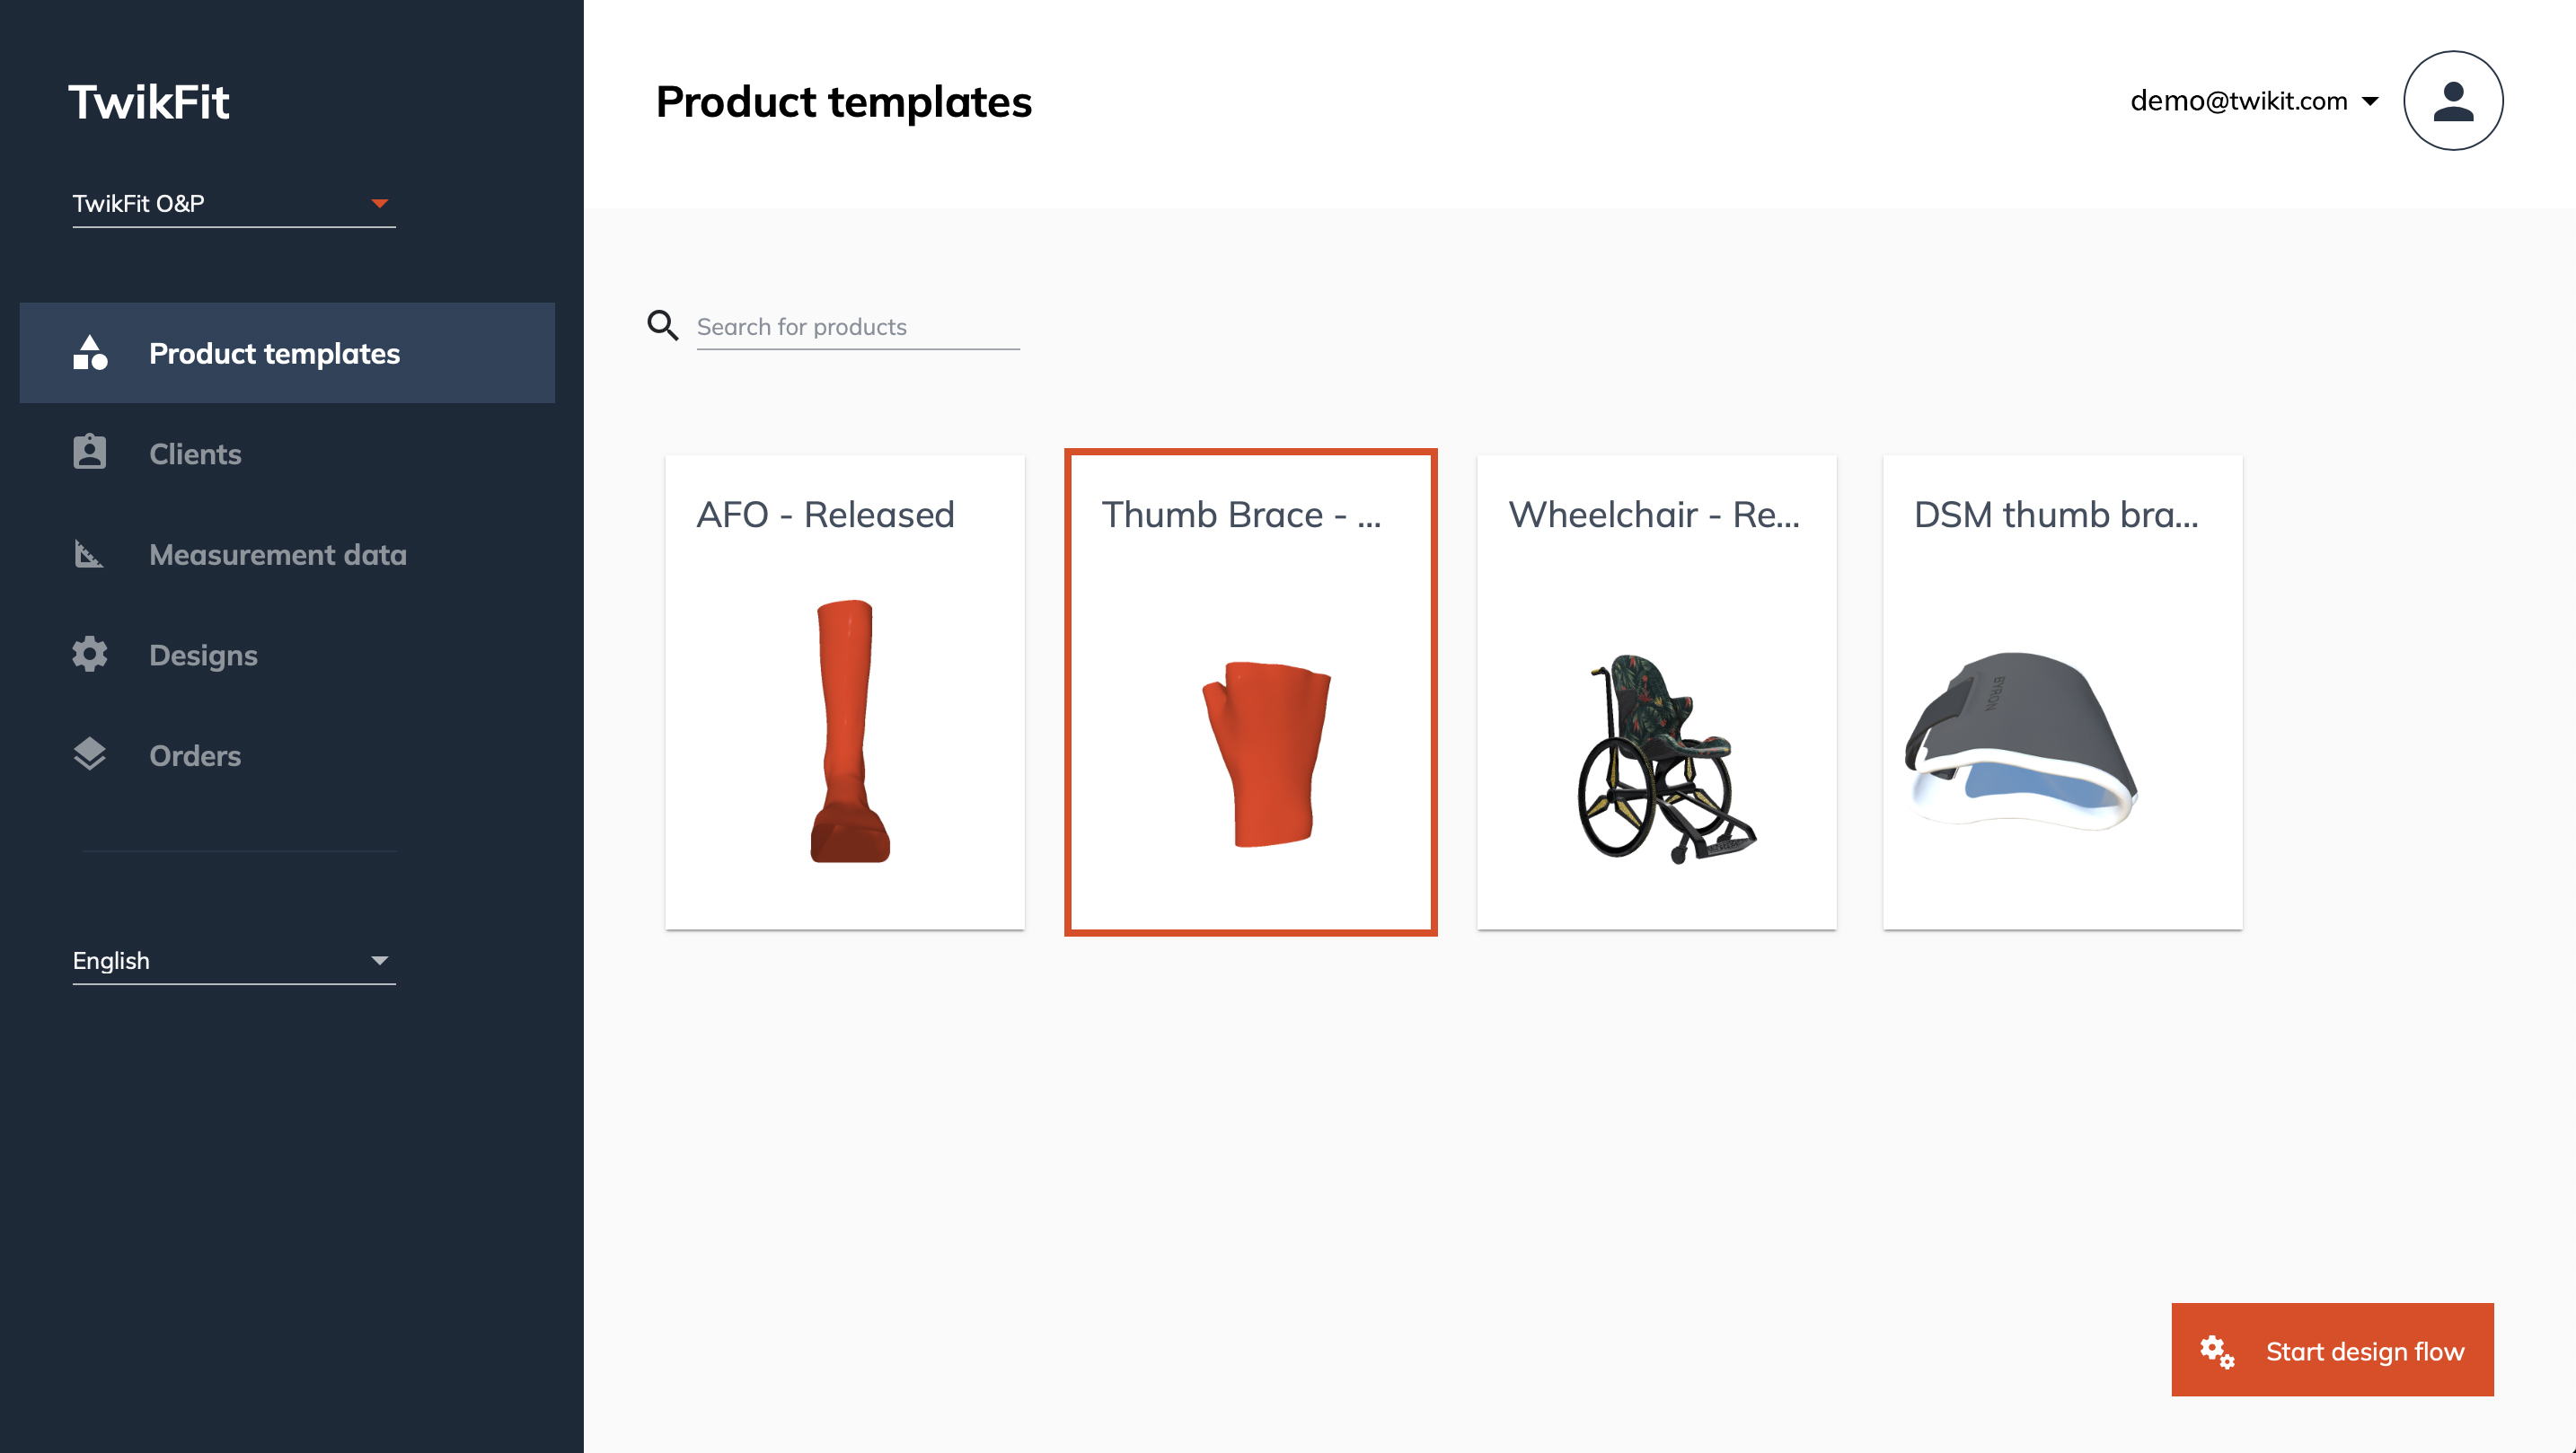 |
Select an existing client or make a new client | 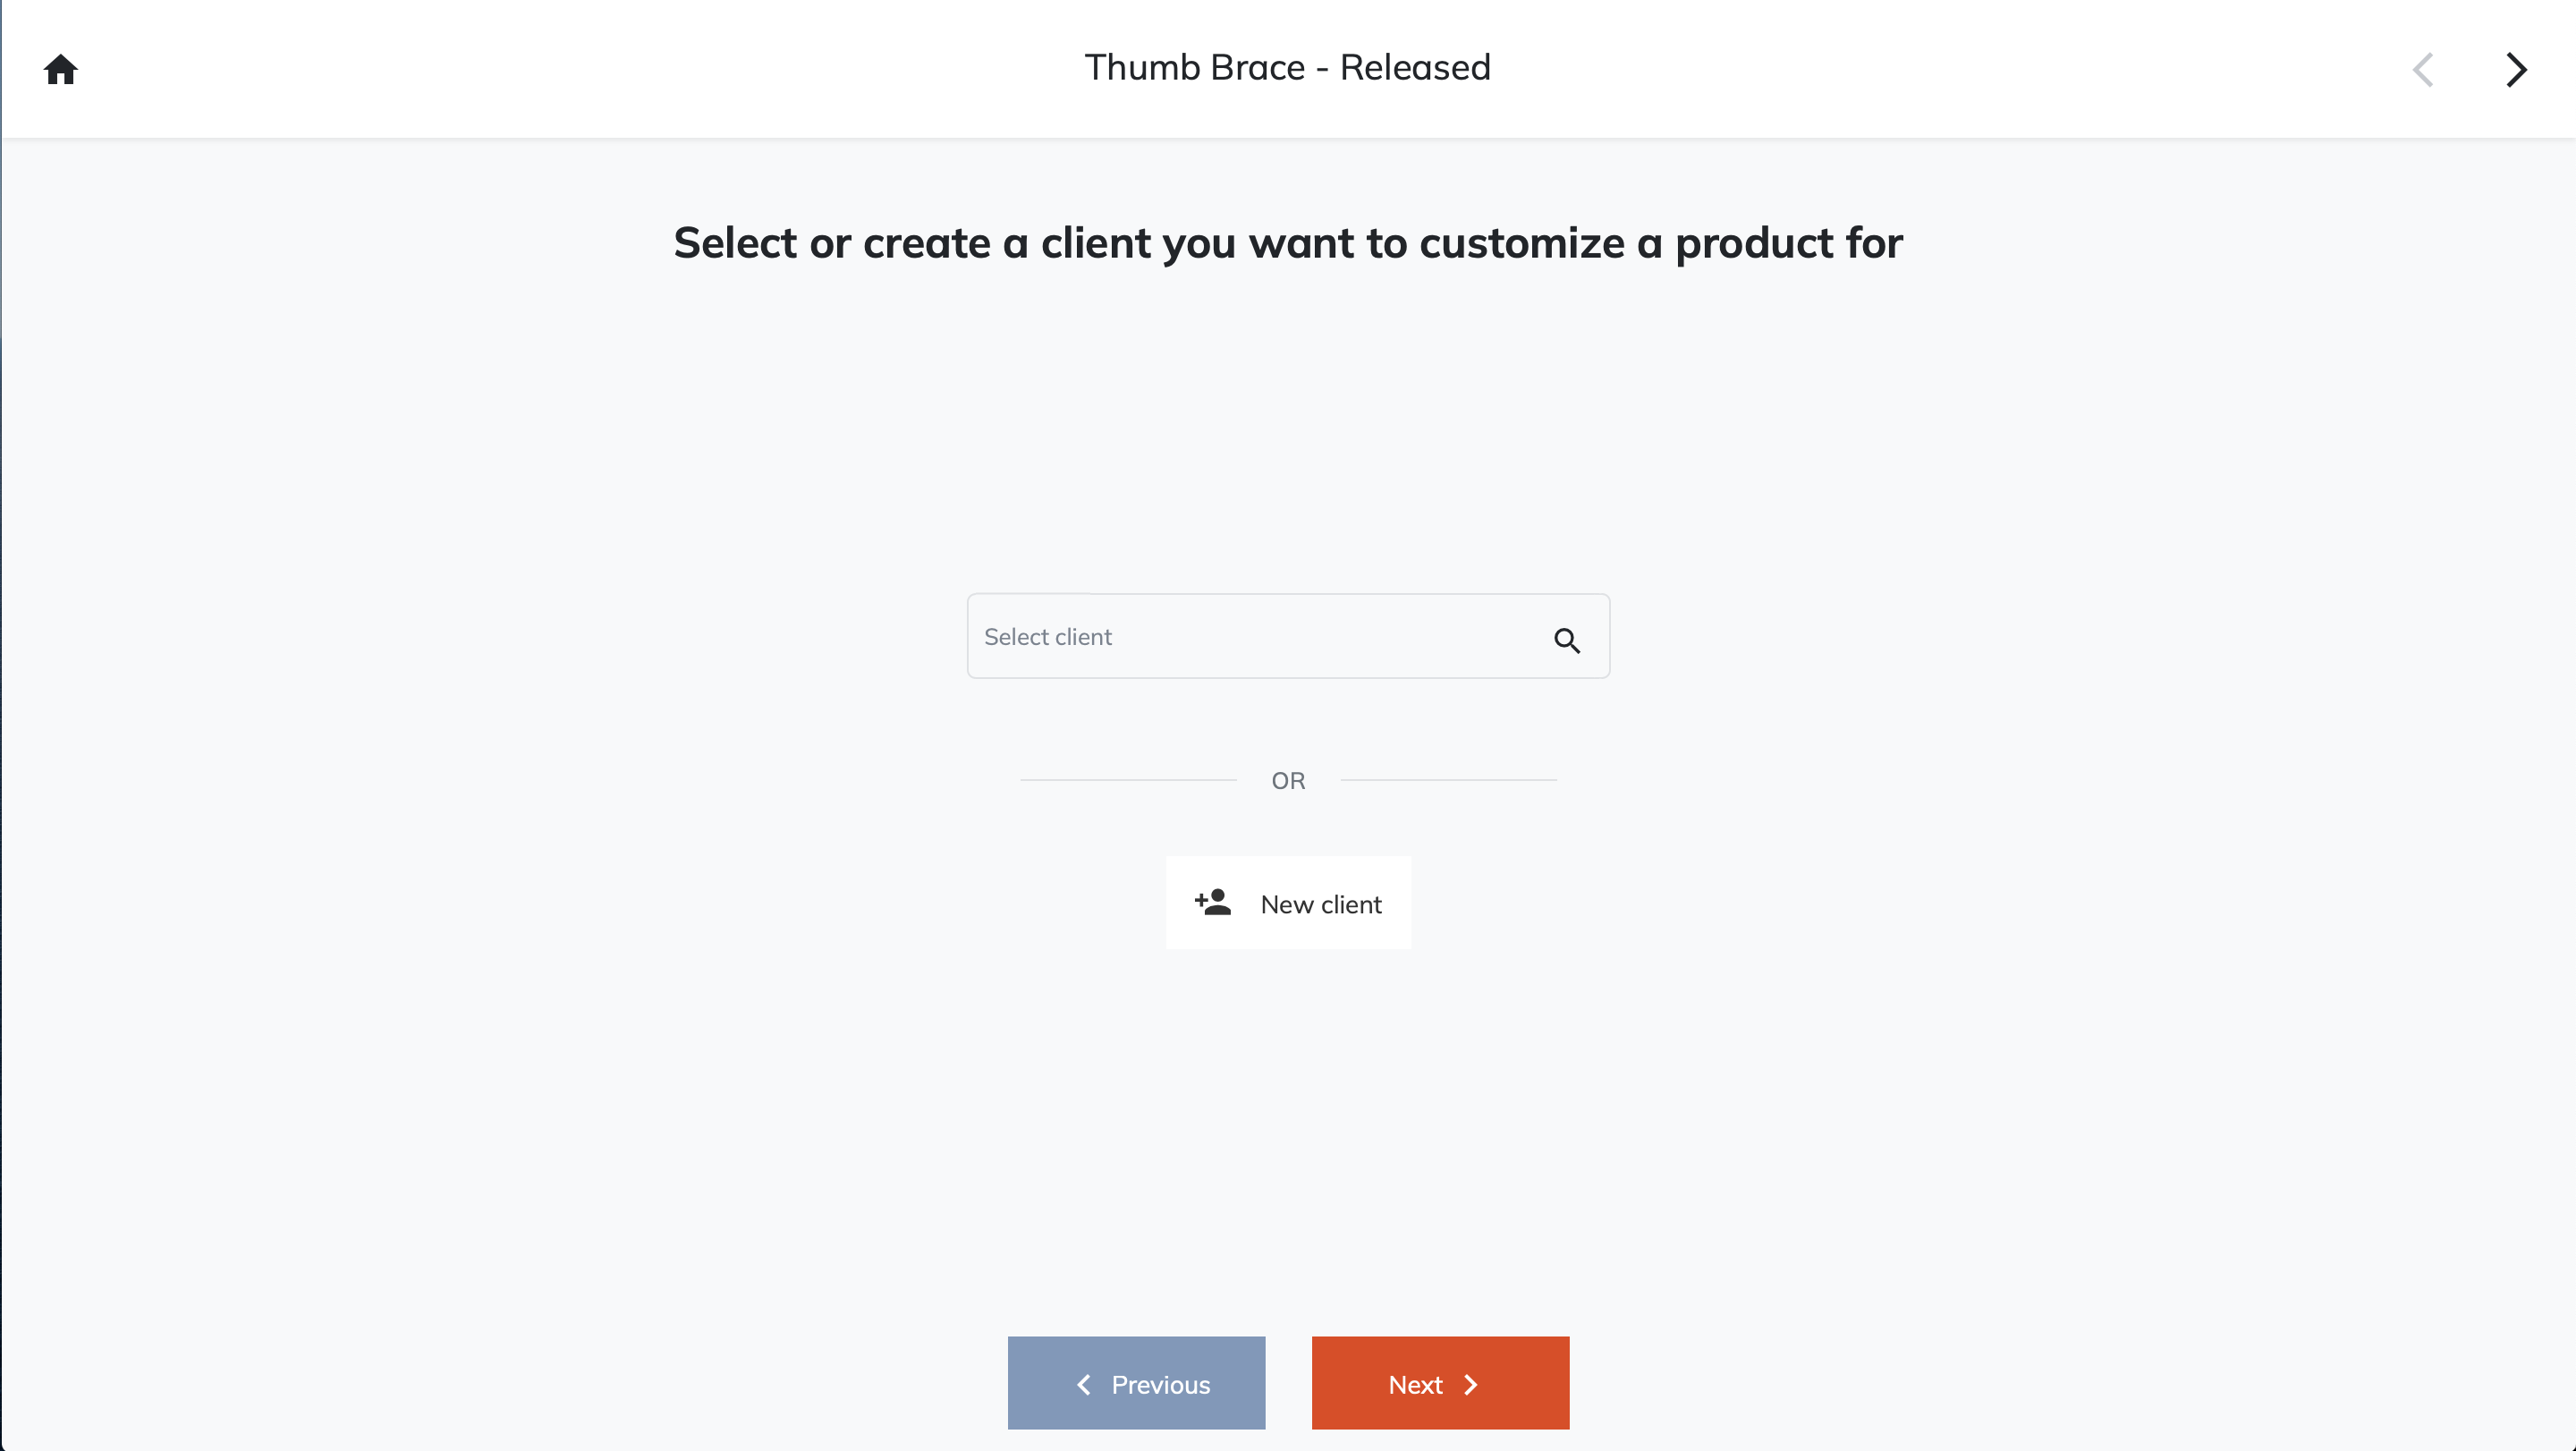 |
Select product template | 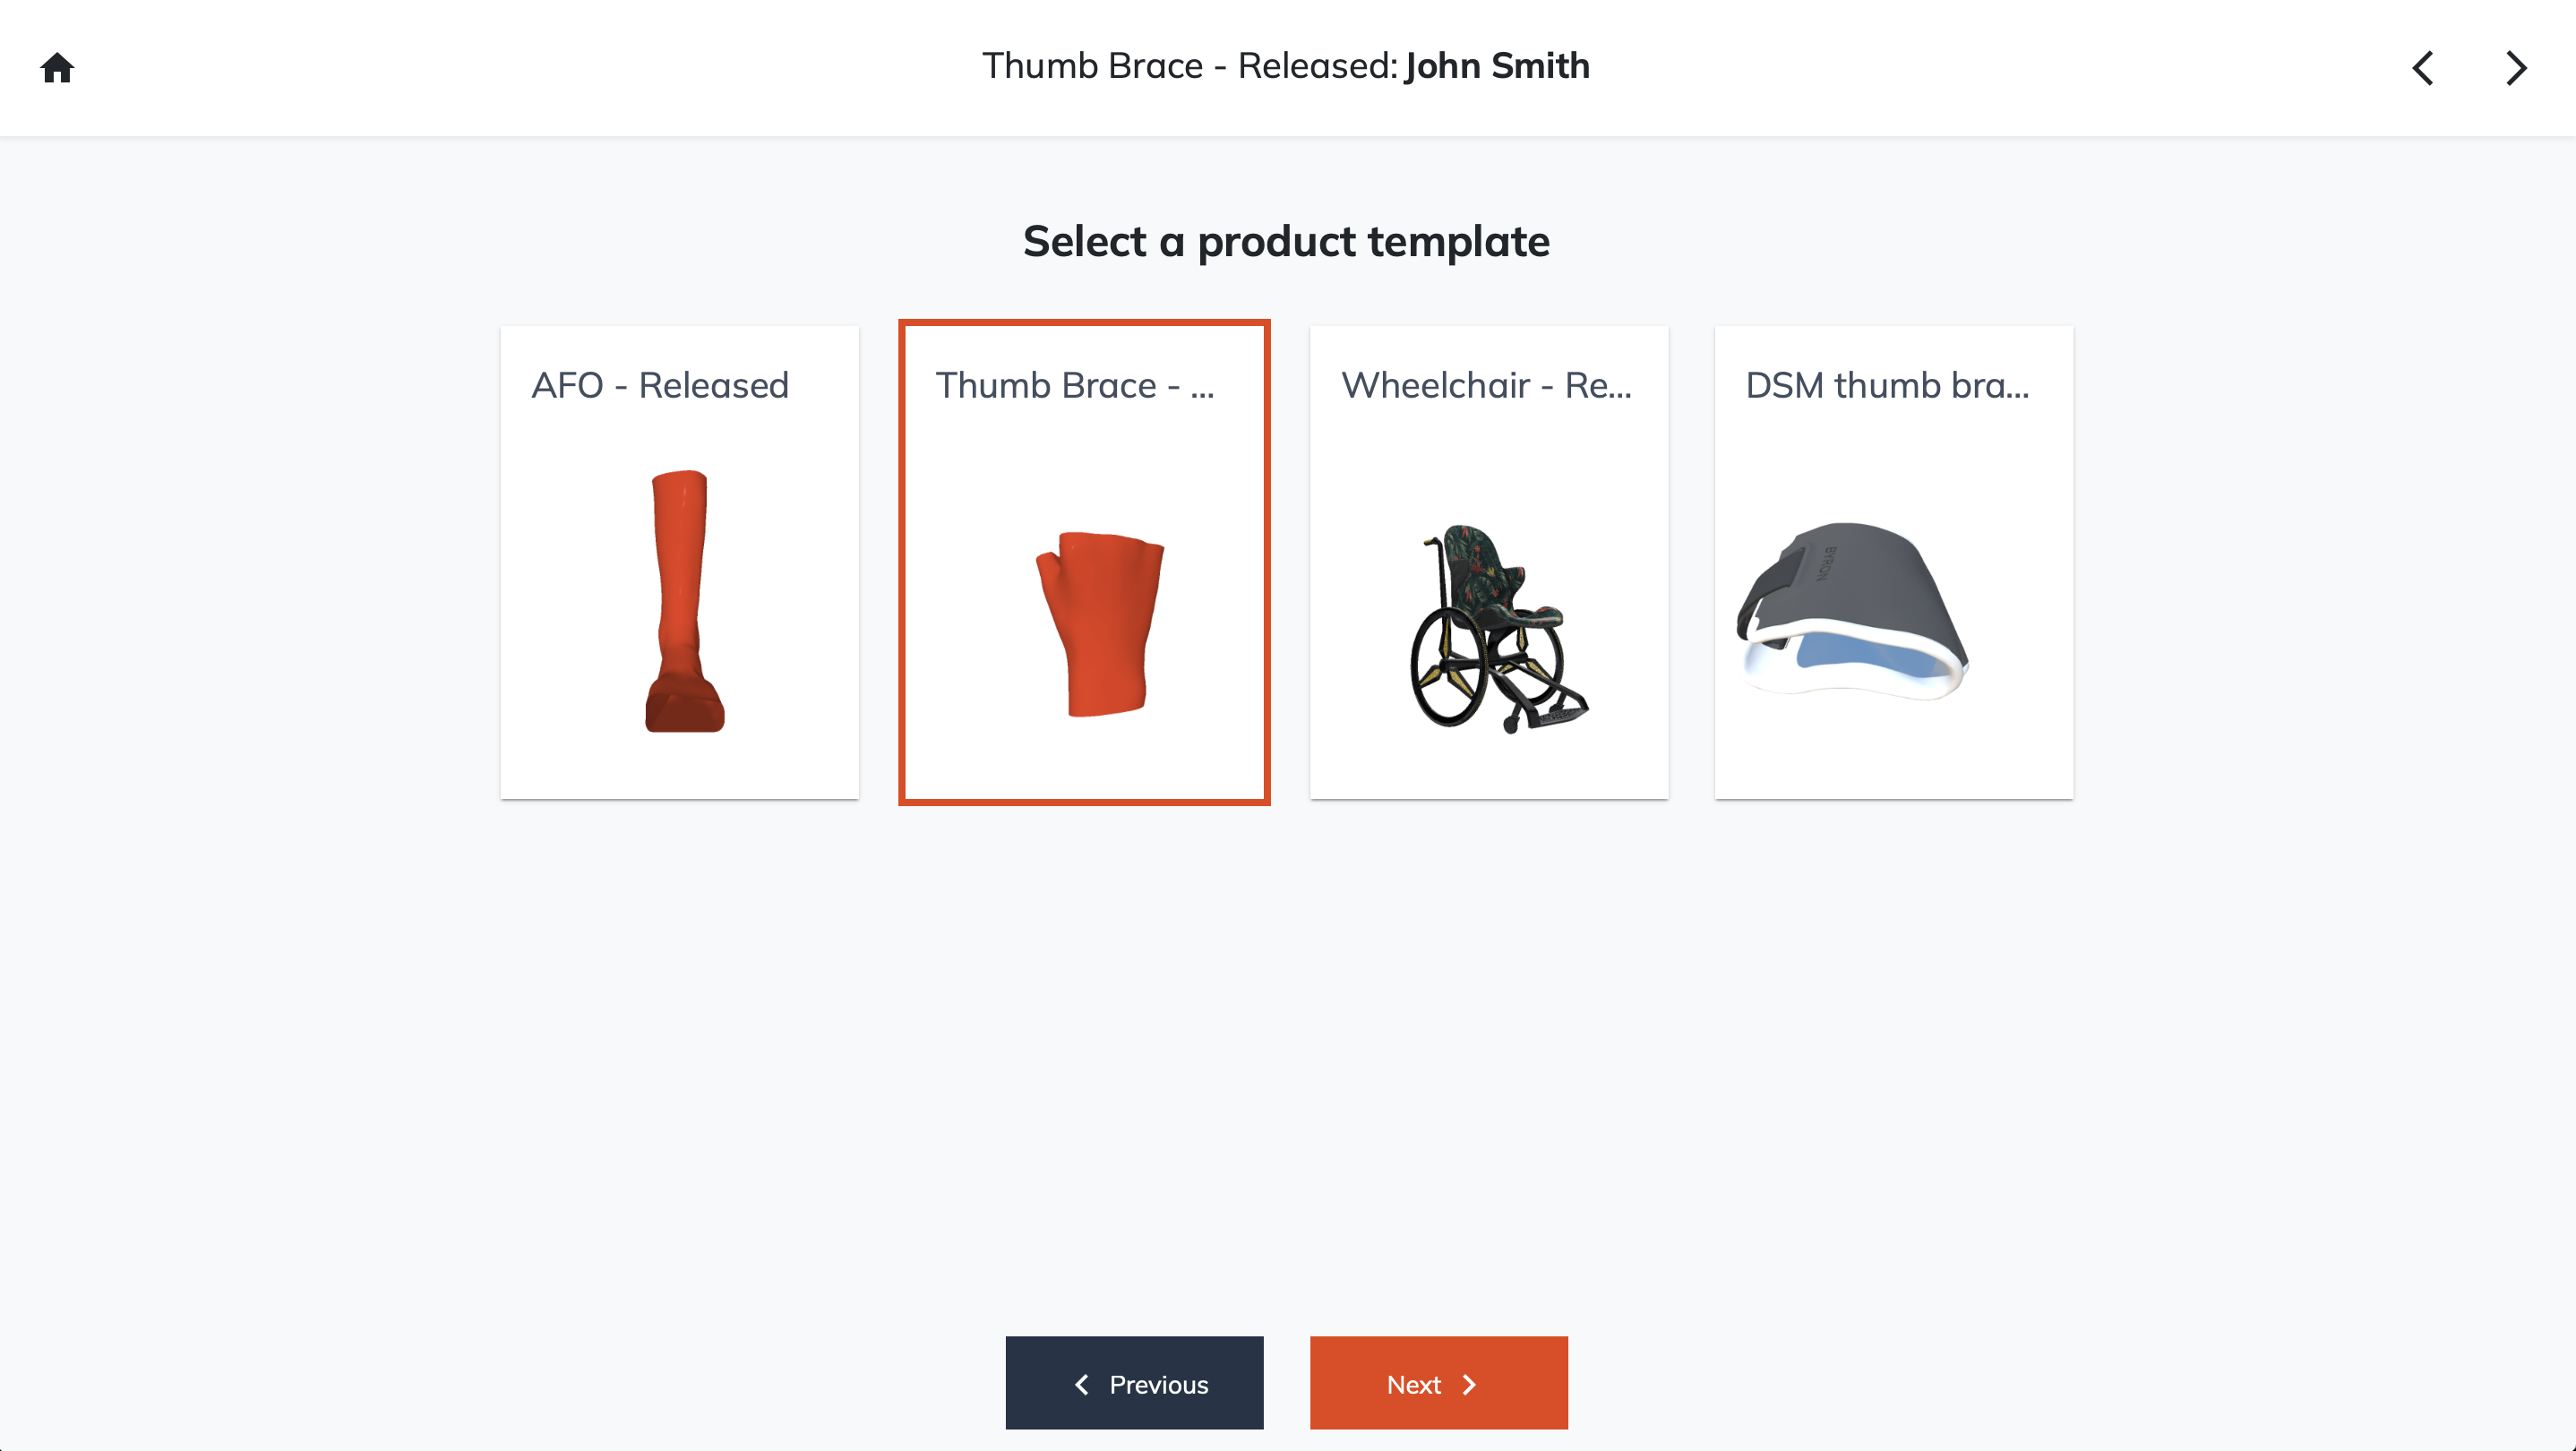 |
Select existing measurements or create new measurement | 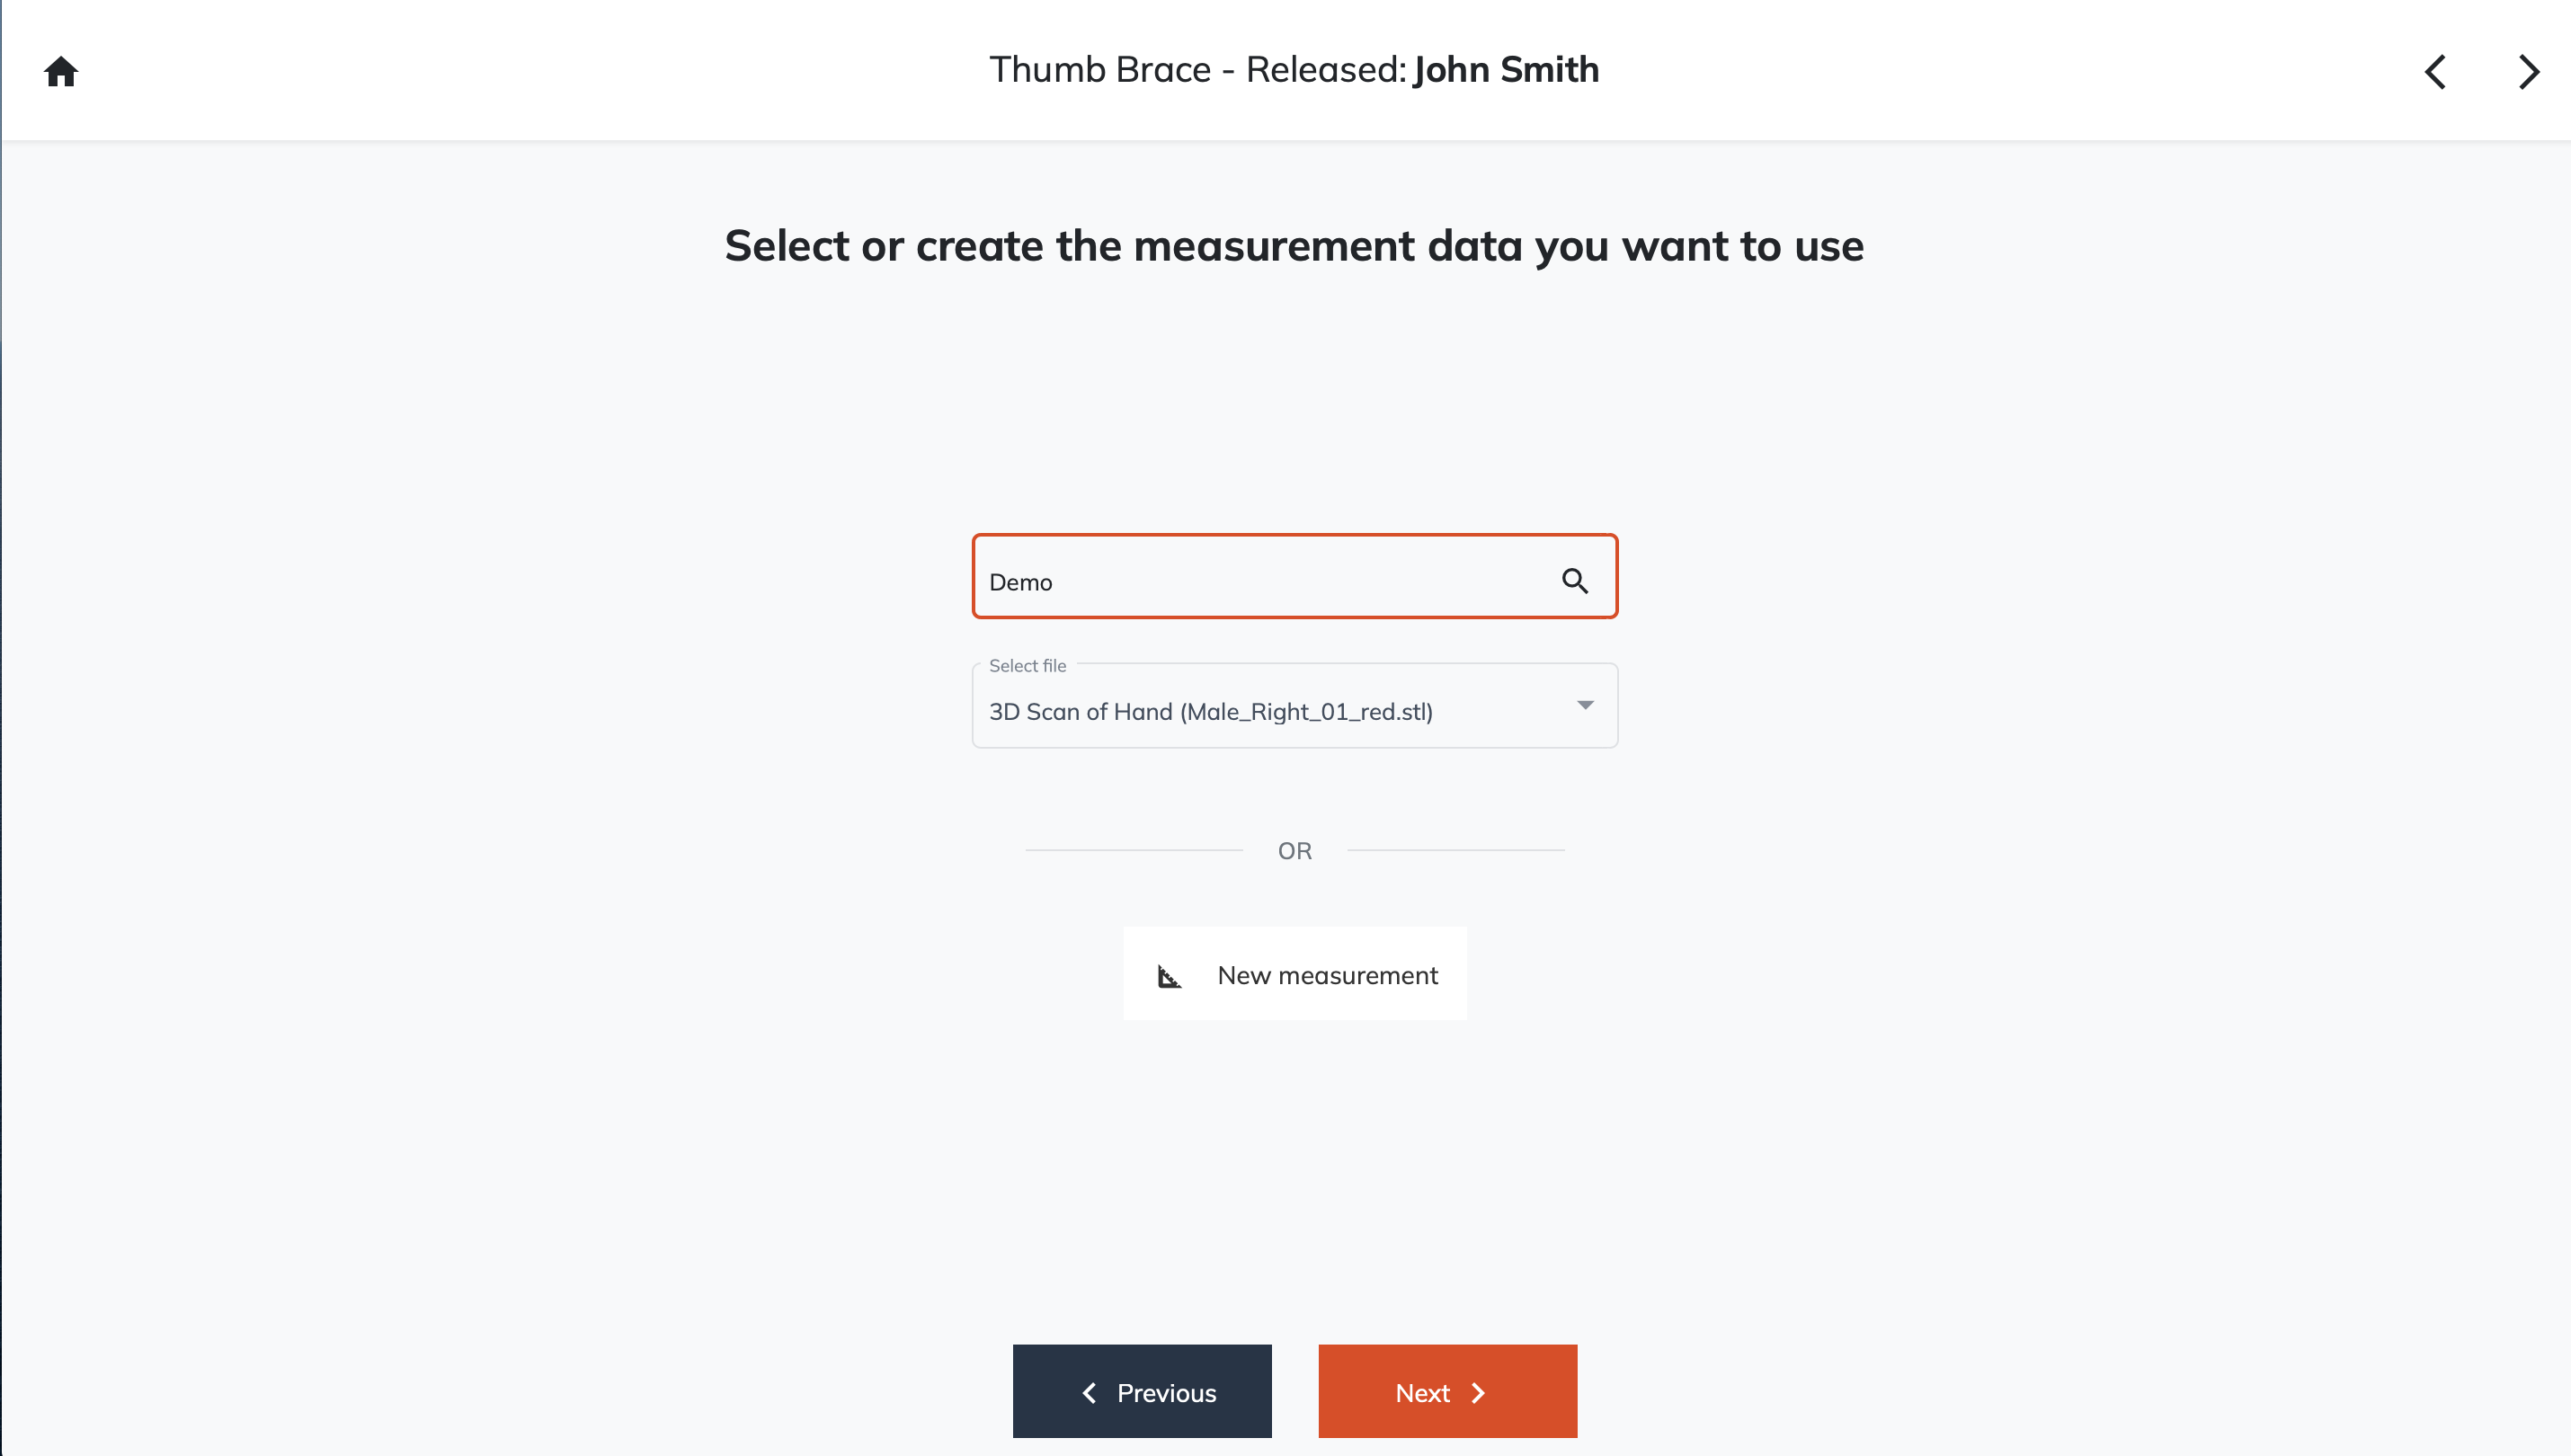 |
Align the 3D scan with the brace | 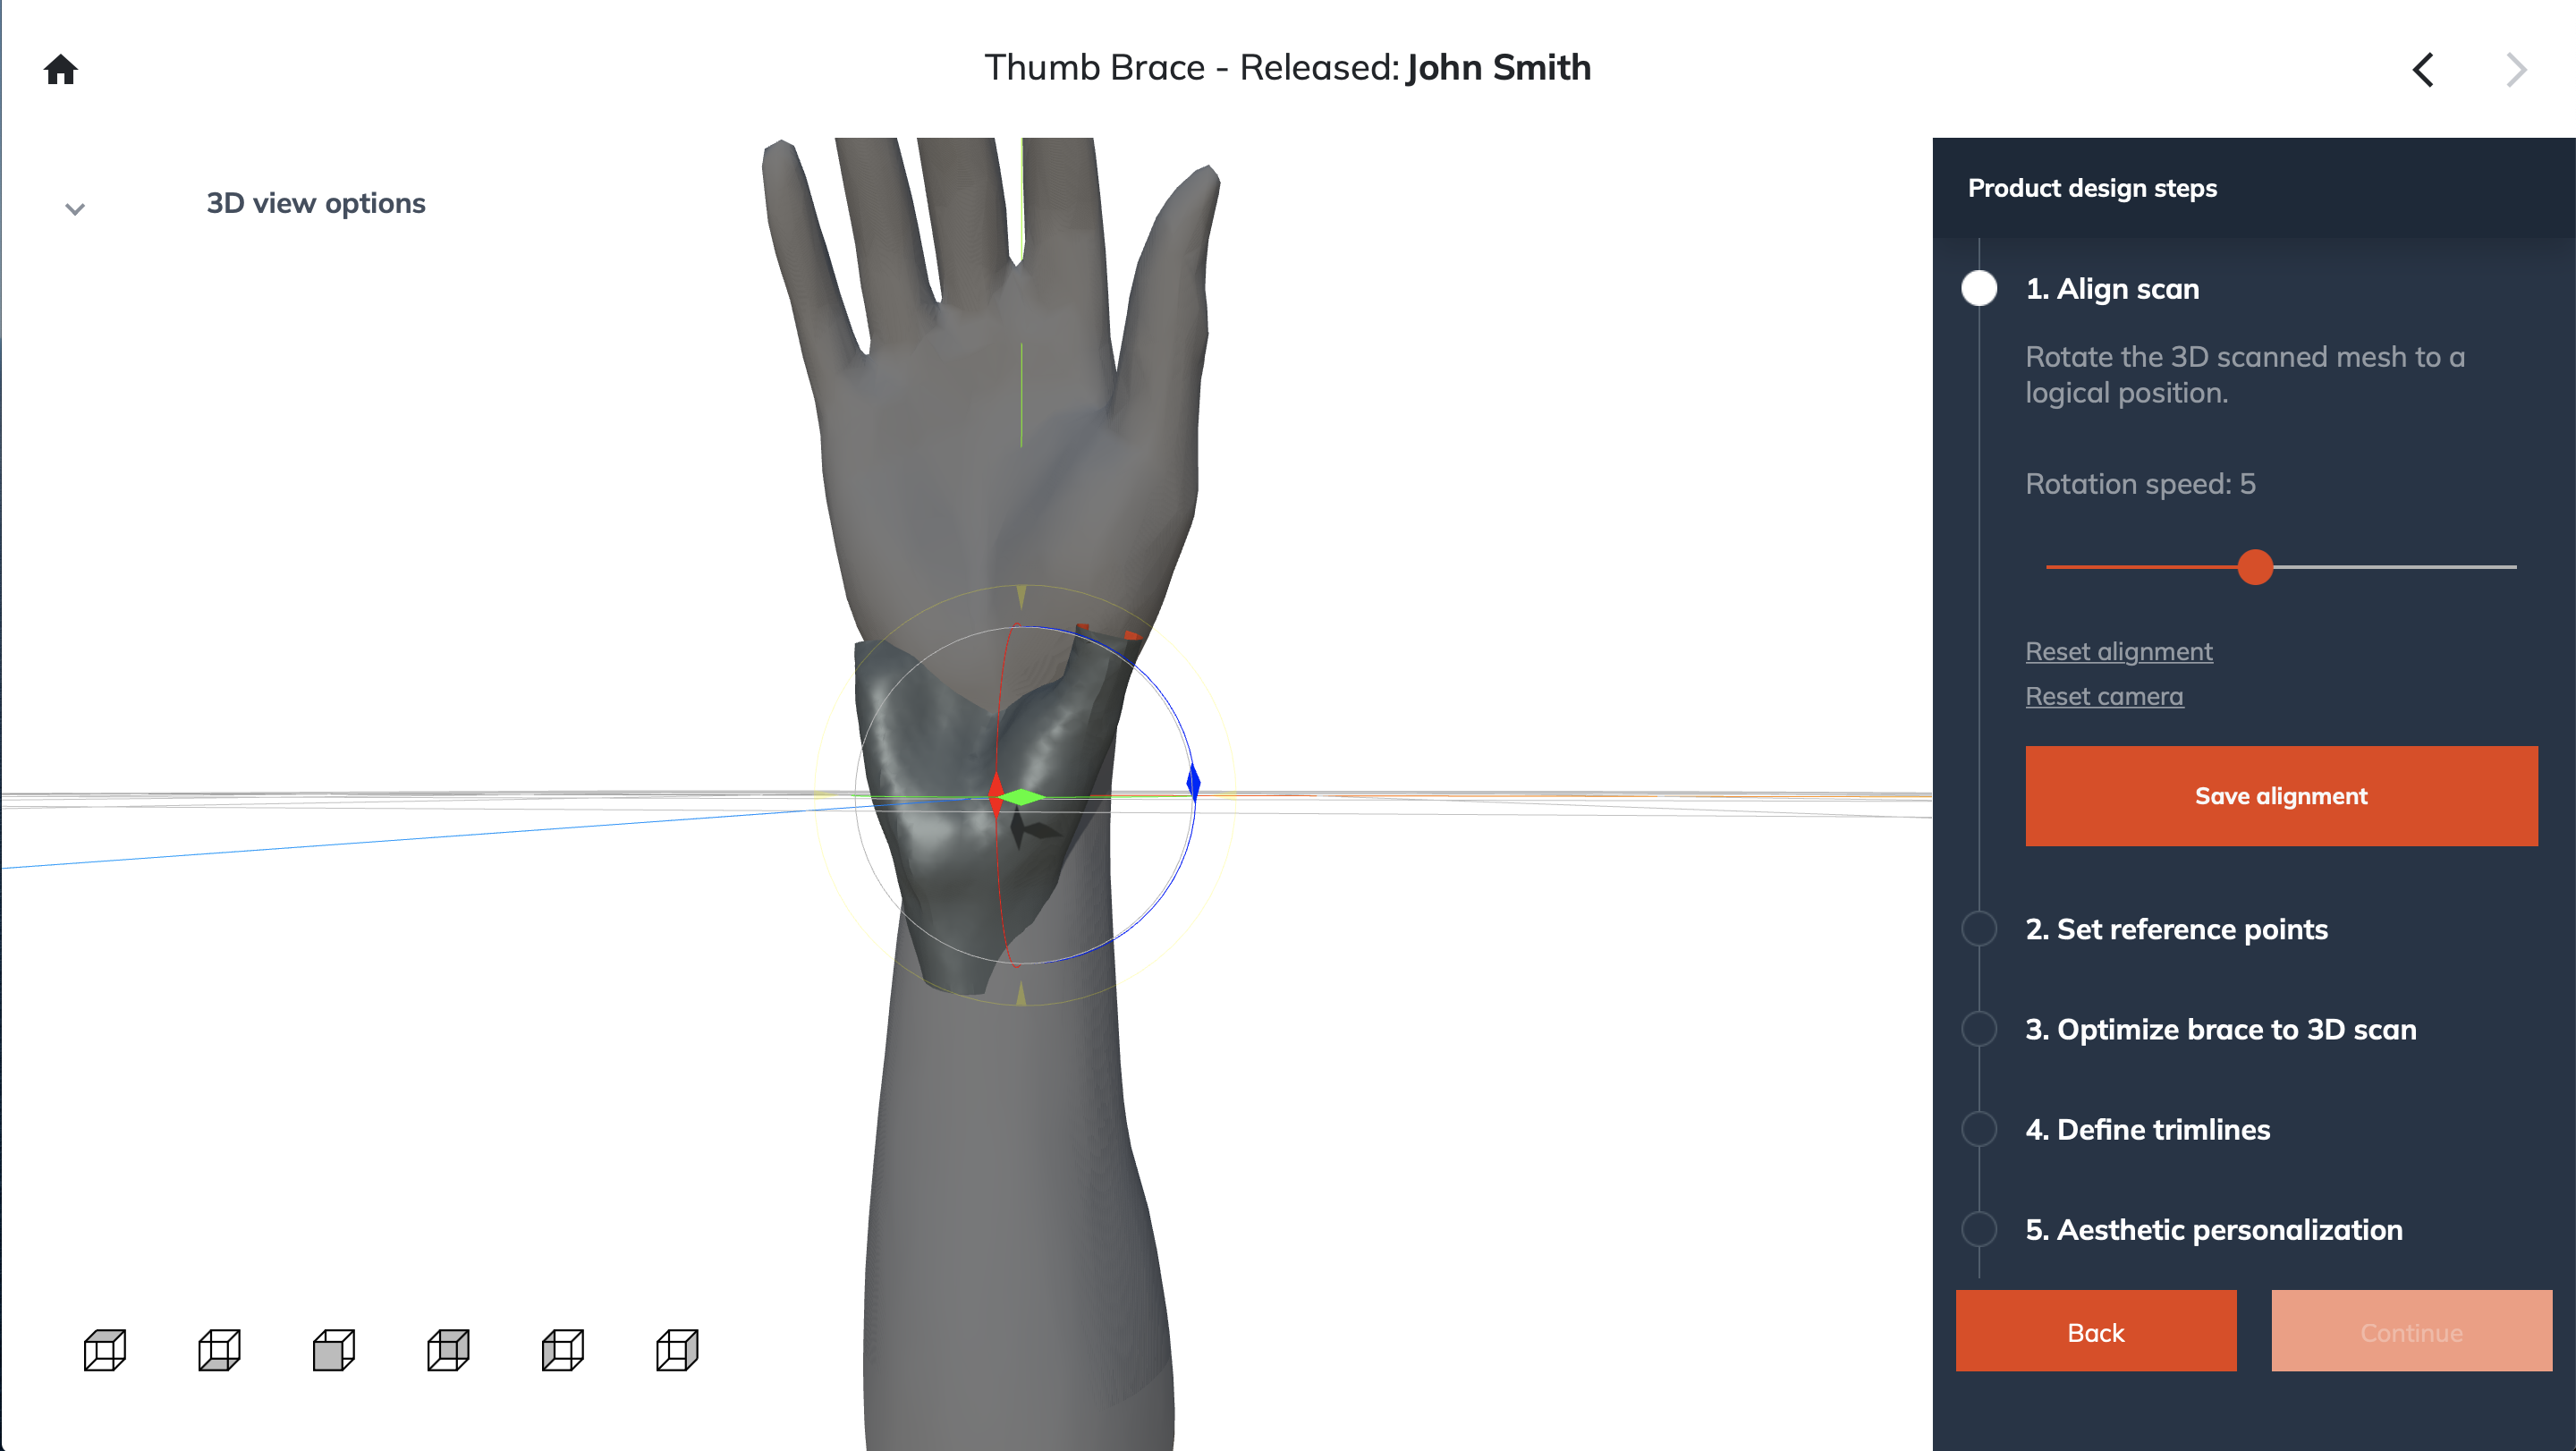 |
Define the reference points on the 3D scan according to the instructions given. When you have set al reference points, click ‘comfirm points’. | 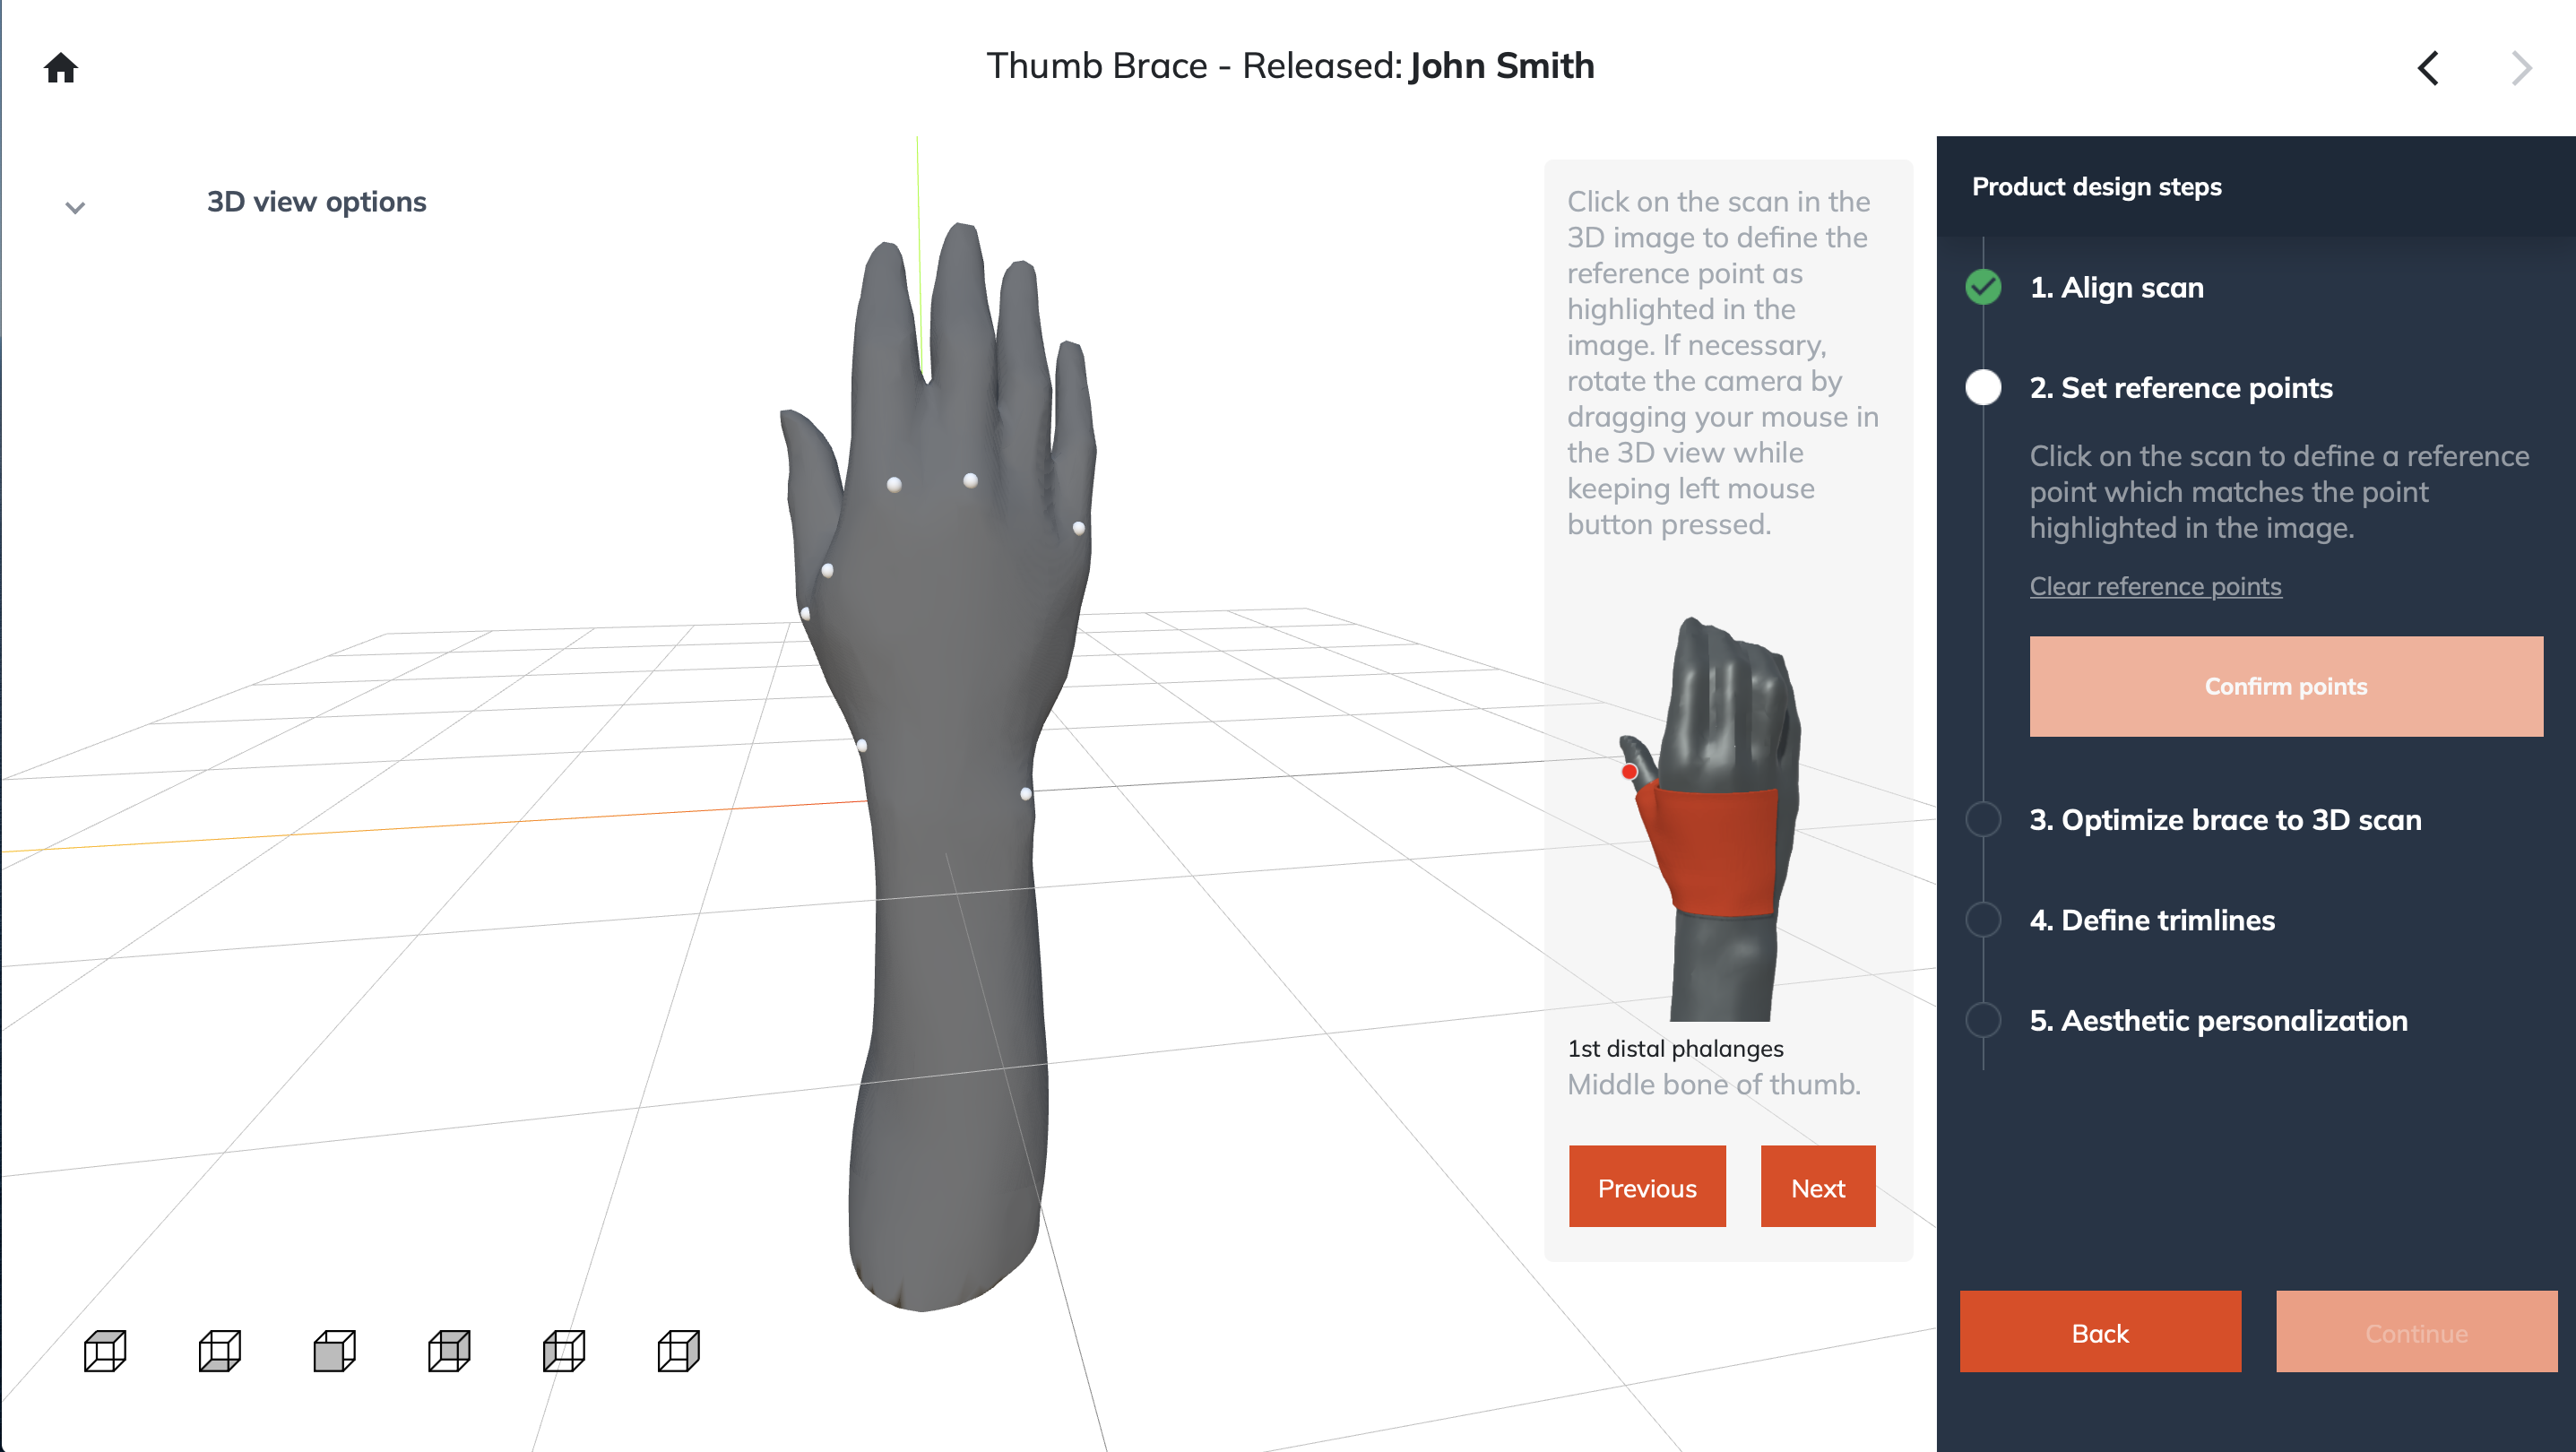 |
Optimize the brace to the 3D scan by clicking on ‘optimize’. The process can take a few minutes. When ready, the ‘optimize’ button will appear green. | 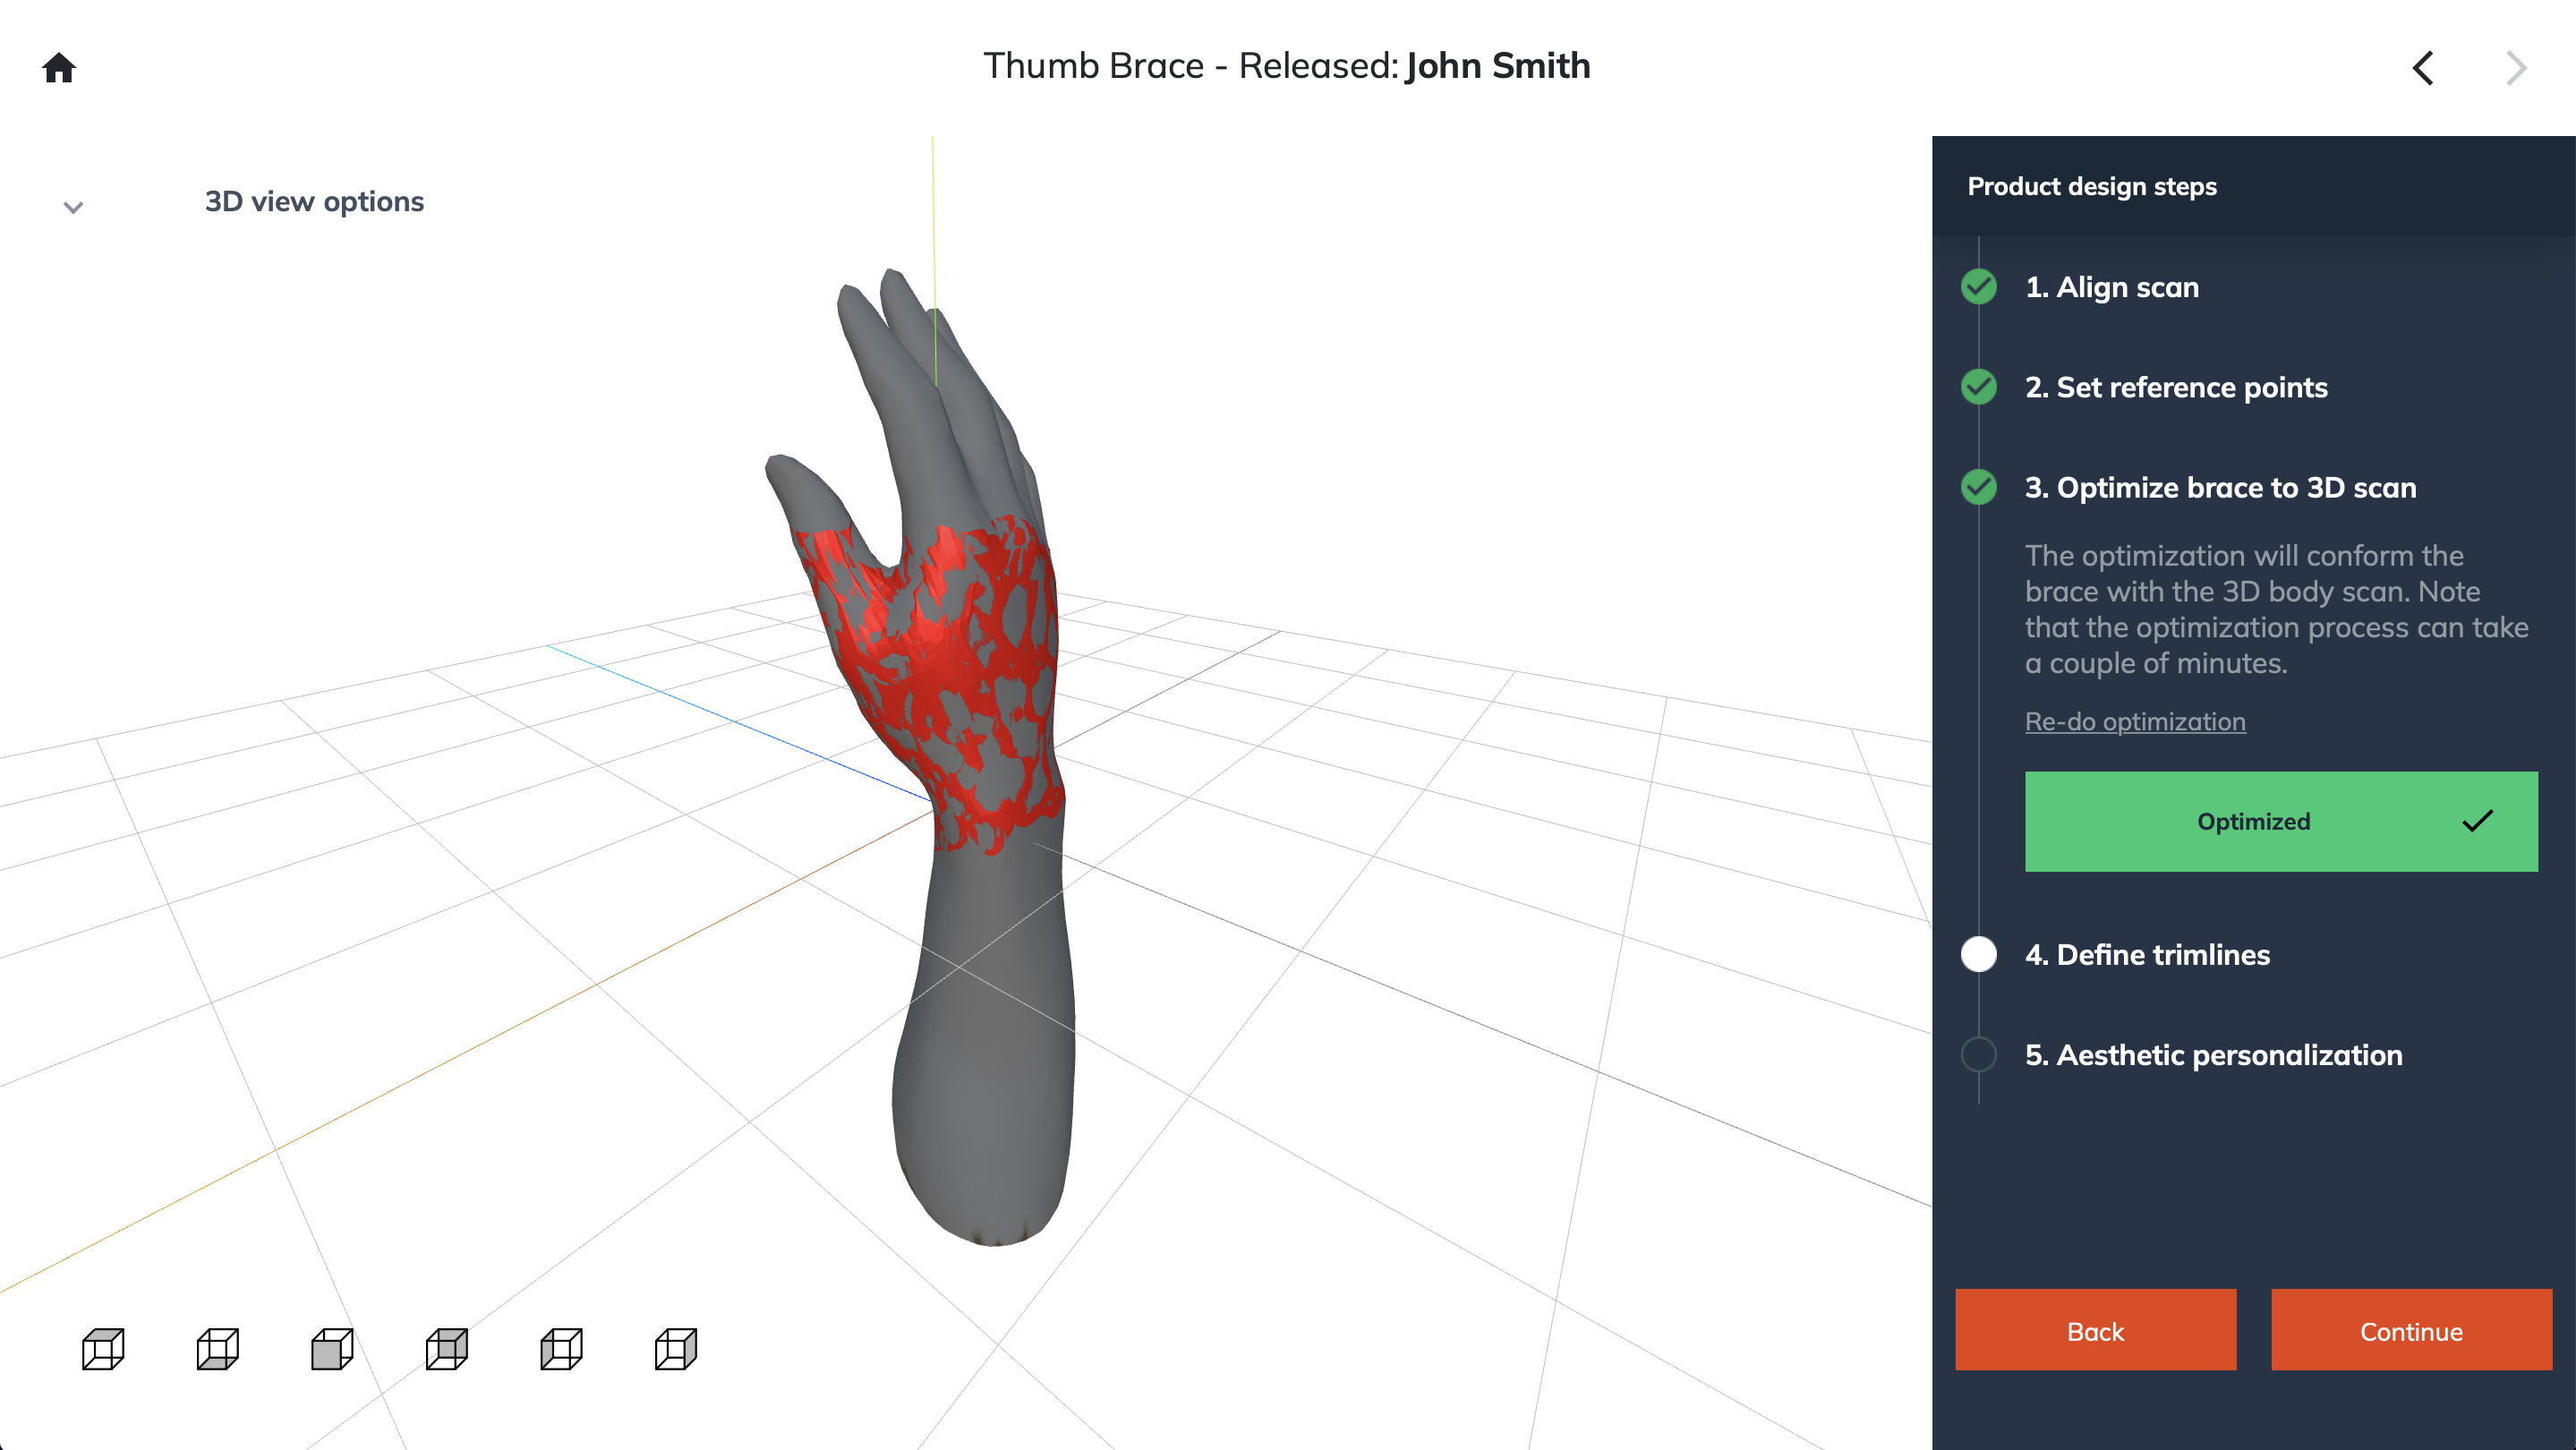 |
The next to last step is defining the trimlines. When you are satisfied with the trimlines, click ‘apply trimlines’. | 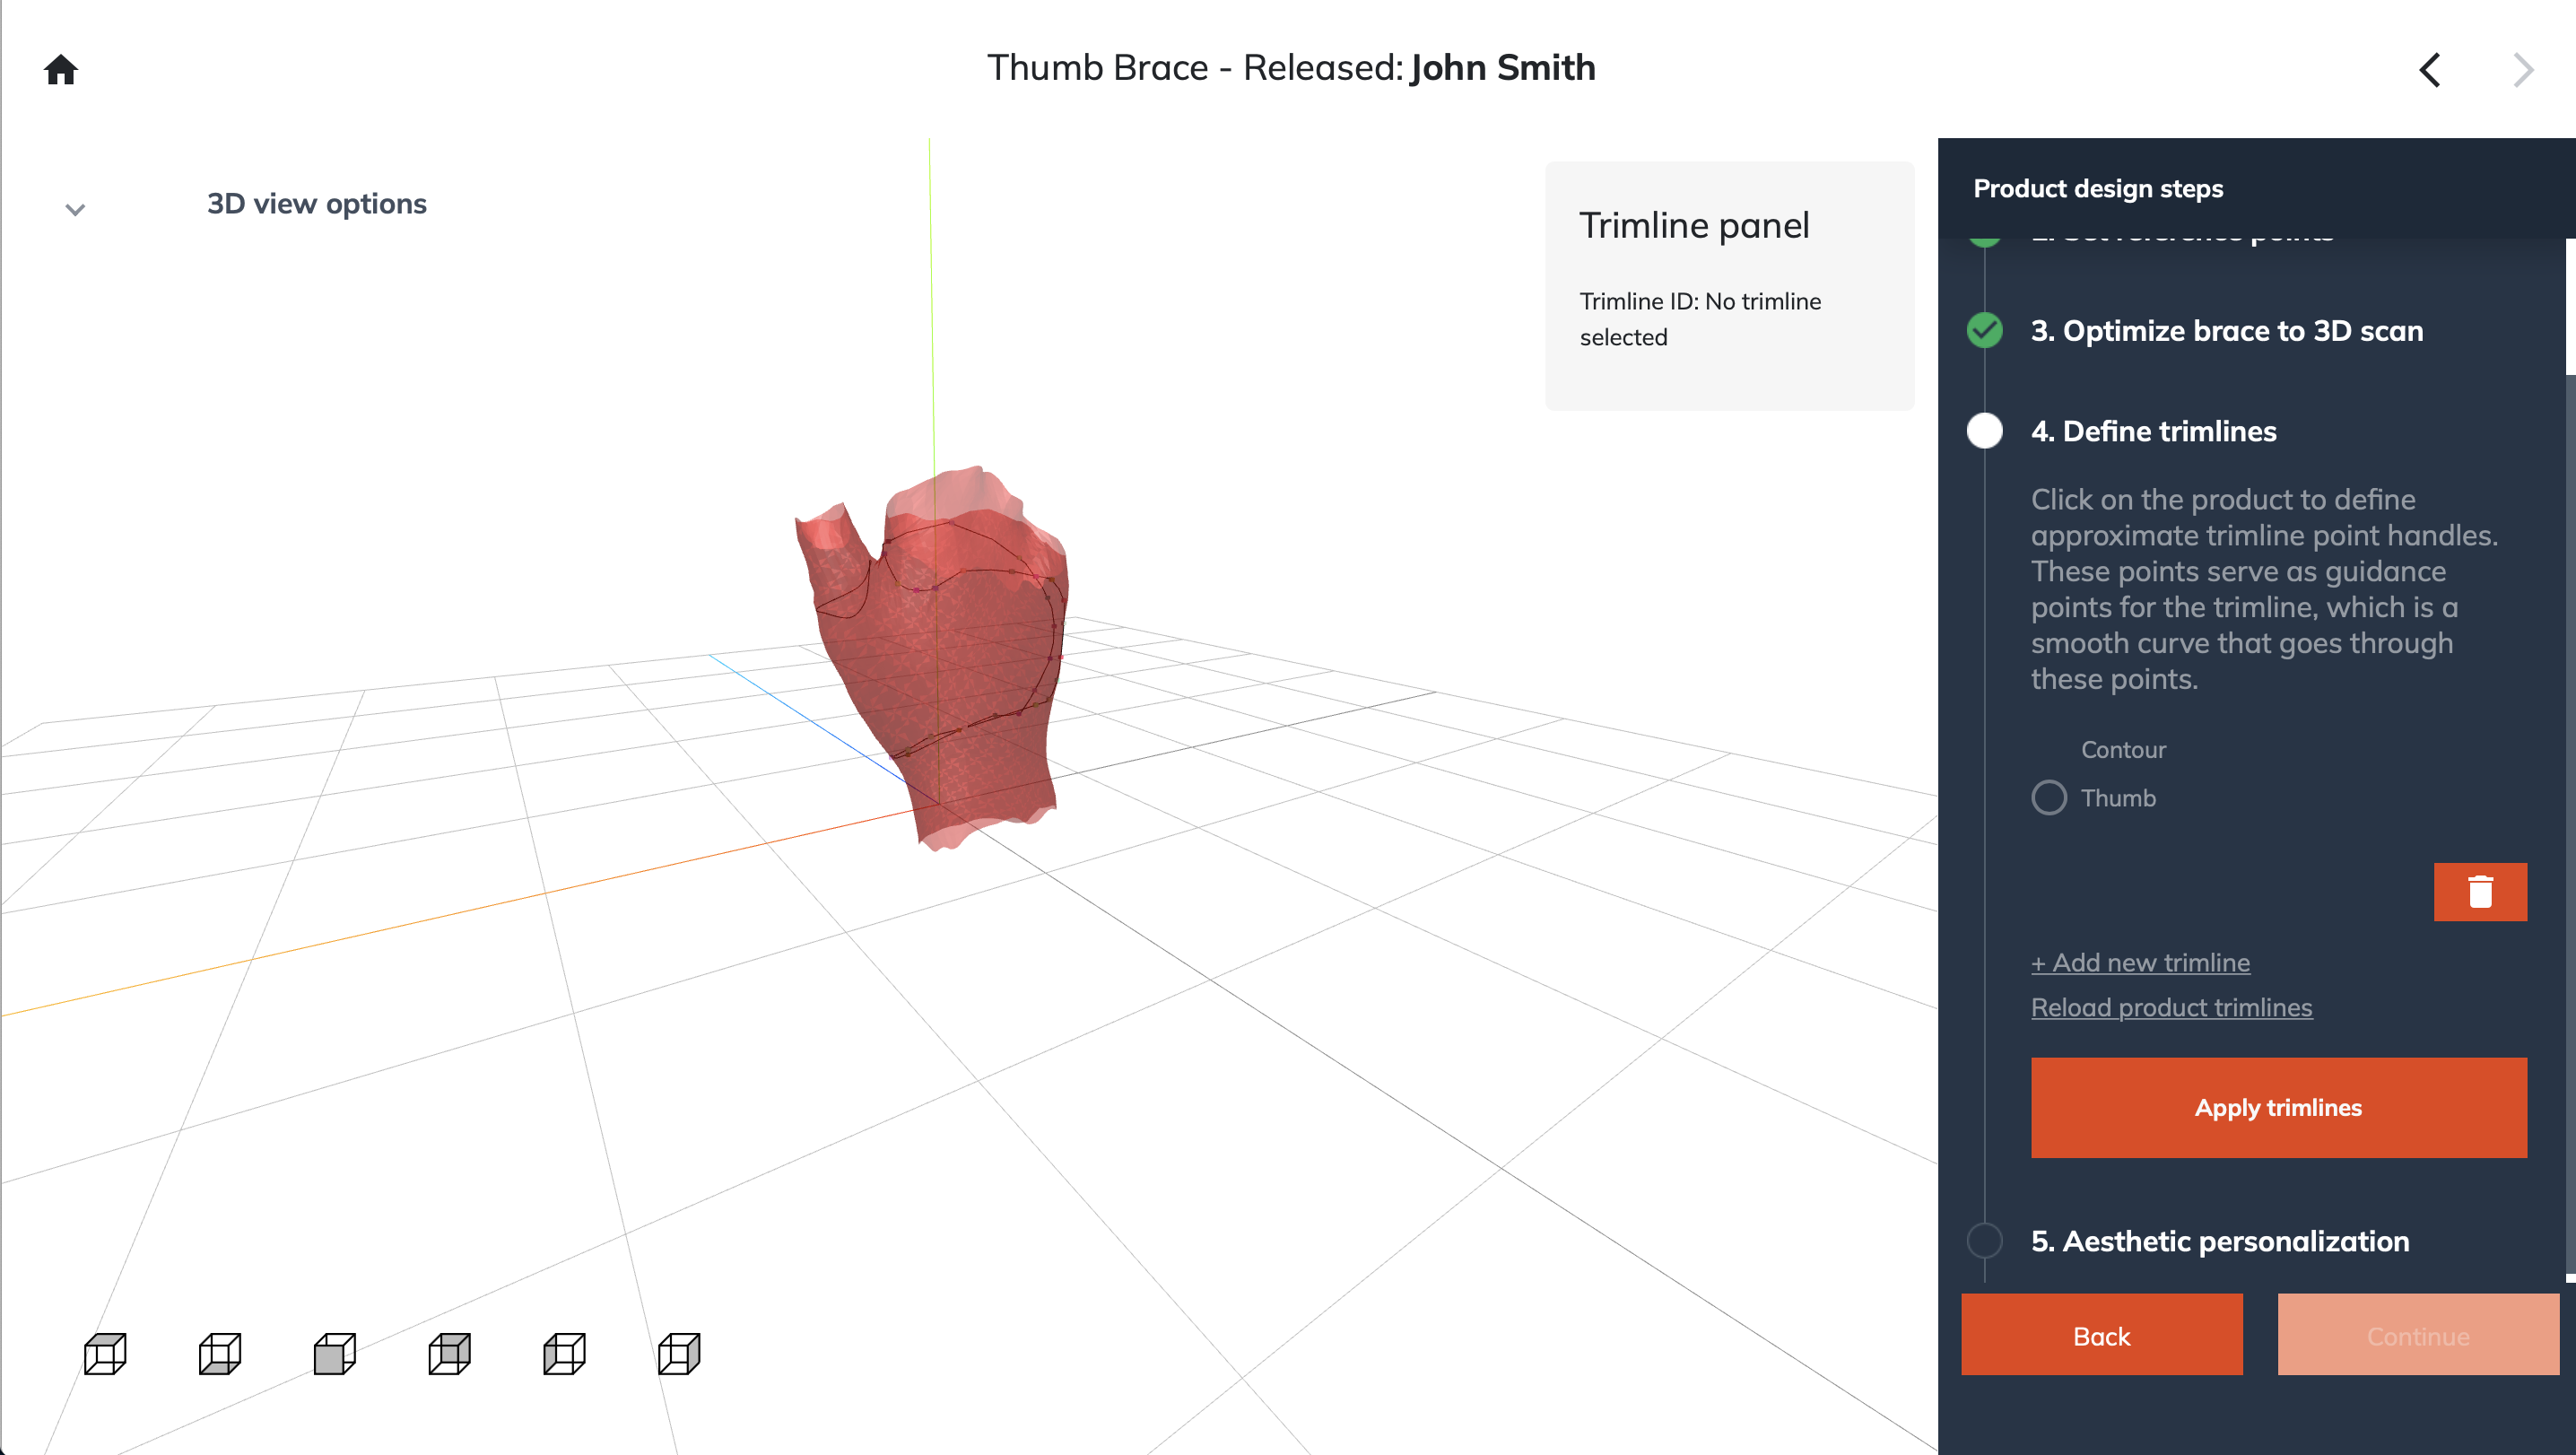 |
Next is the aesthetic personalization. Here you can adjust the thickness, color, and surface finish. | 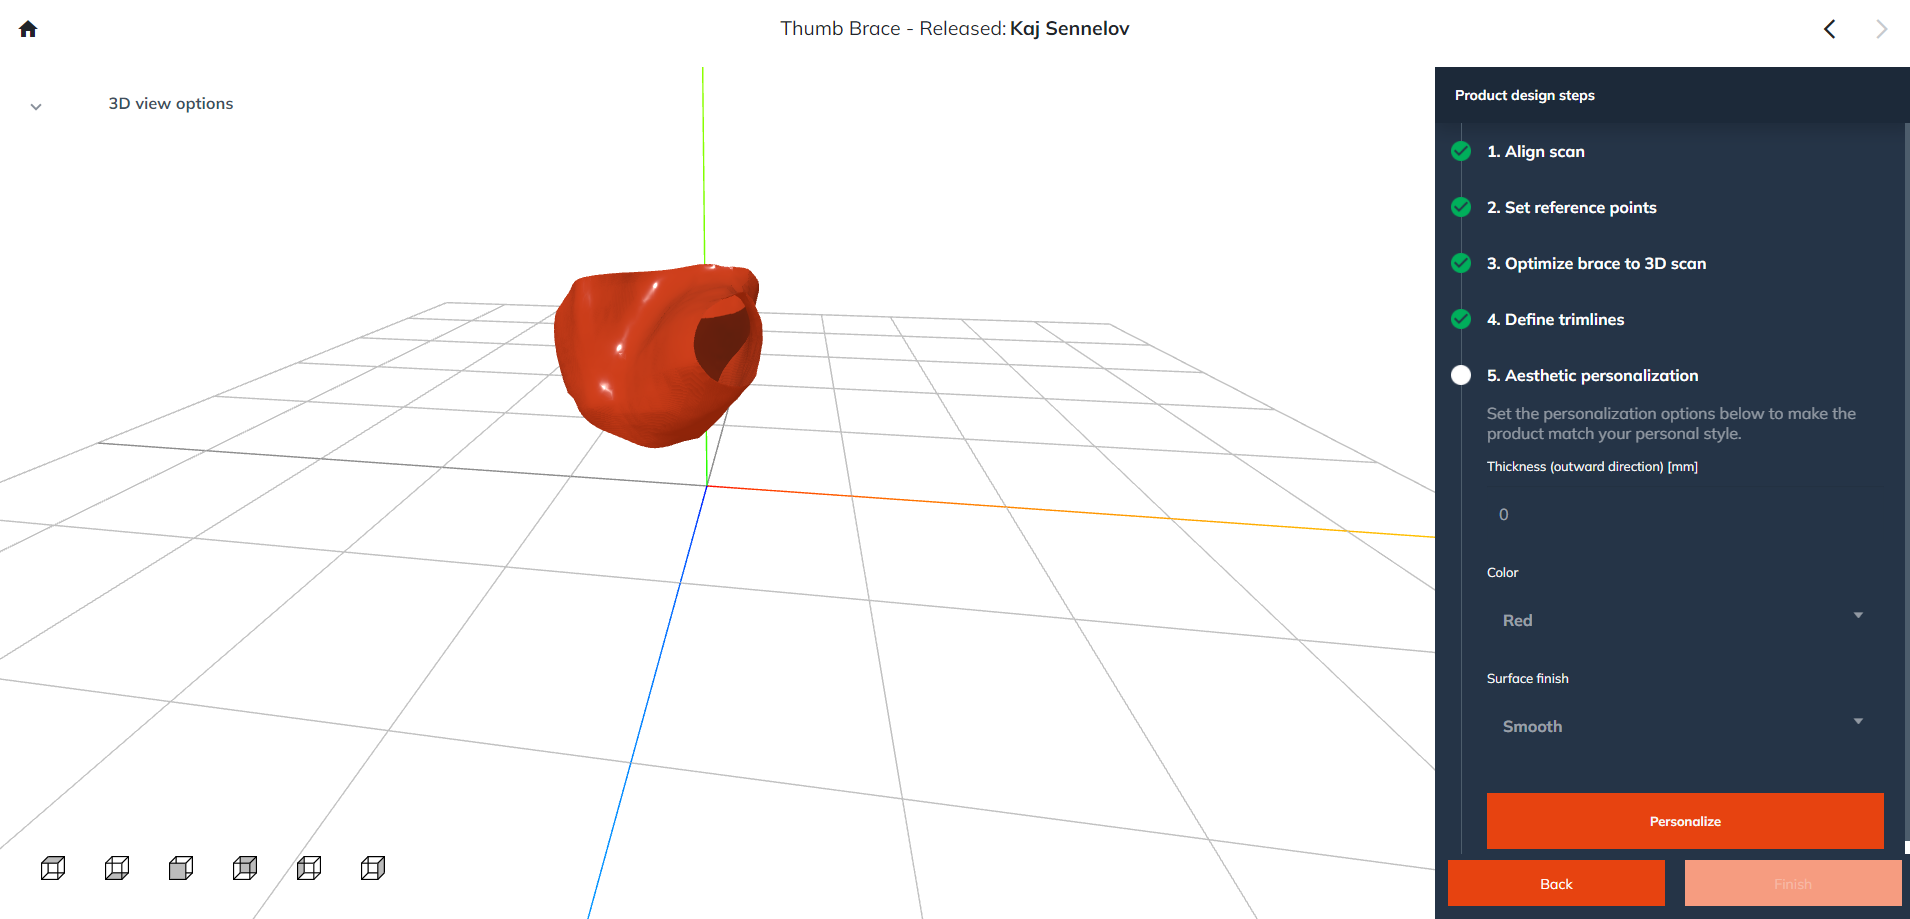 |
When the brace is customized to your liking, click the ‘personalize’ button. | 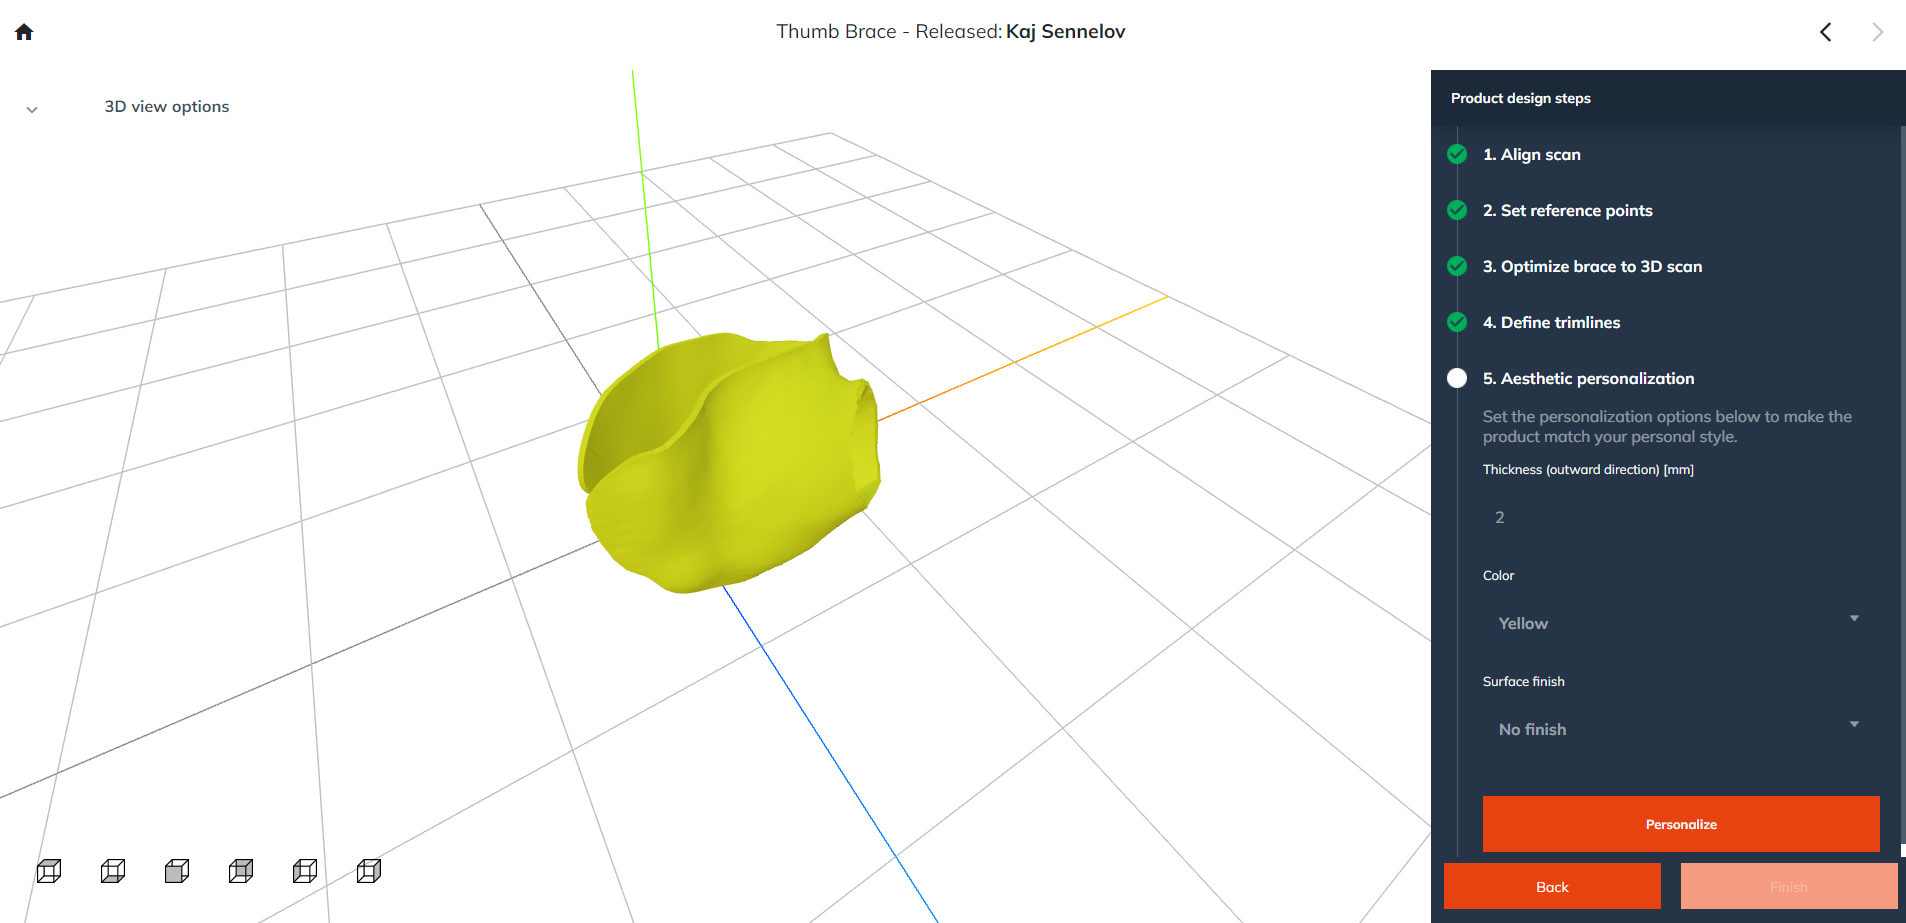 |
Now the thumb brace is finalized and ready to order and export the production files. Click ‘finish’ to proceed. | 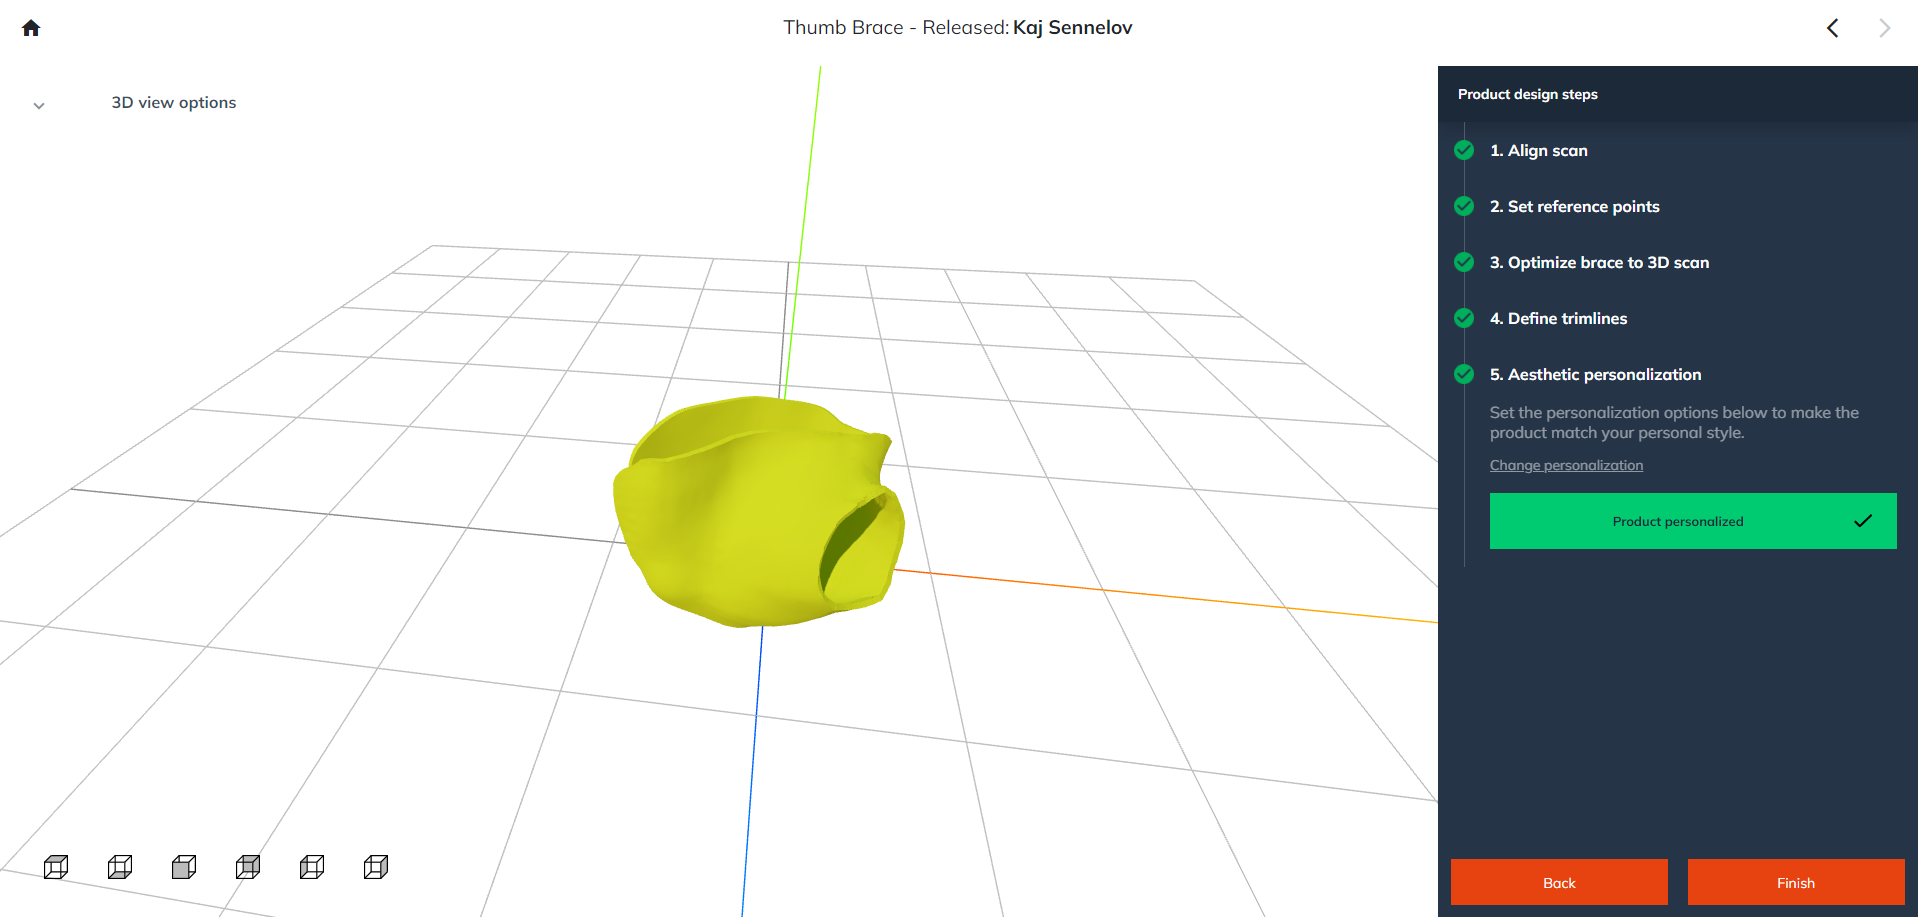 |